
![]() Home delivery order requires
Home delivery order requires
Cust Plugin, formerly known as OroCust provides delivery and pickup management in ORO POS. When a customer calls the store if store phone is connected to caller id device Cust will look for a matching phone number and suggest a delivery address. In other cases, the store operators can save the customer profiles and proceed to the next step. Cust is integrated with Google Map API, to calculate delivery distance. In the recent version of Cust also receives online orders from Menugreat with separate connector plugin. To enable these services we need to follow these steps
- Backoffice Configuration.
- Delivery Dispatch view
- Sending Order To the Kitchen.
- Assigning Driver and Driver View.
Configuring Back office
Setting up Order Type
To configure an order type visit, Back office–> admin–> order type–> edit/new
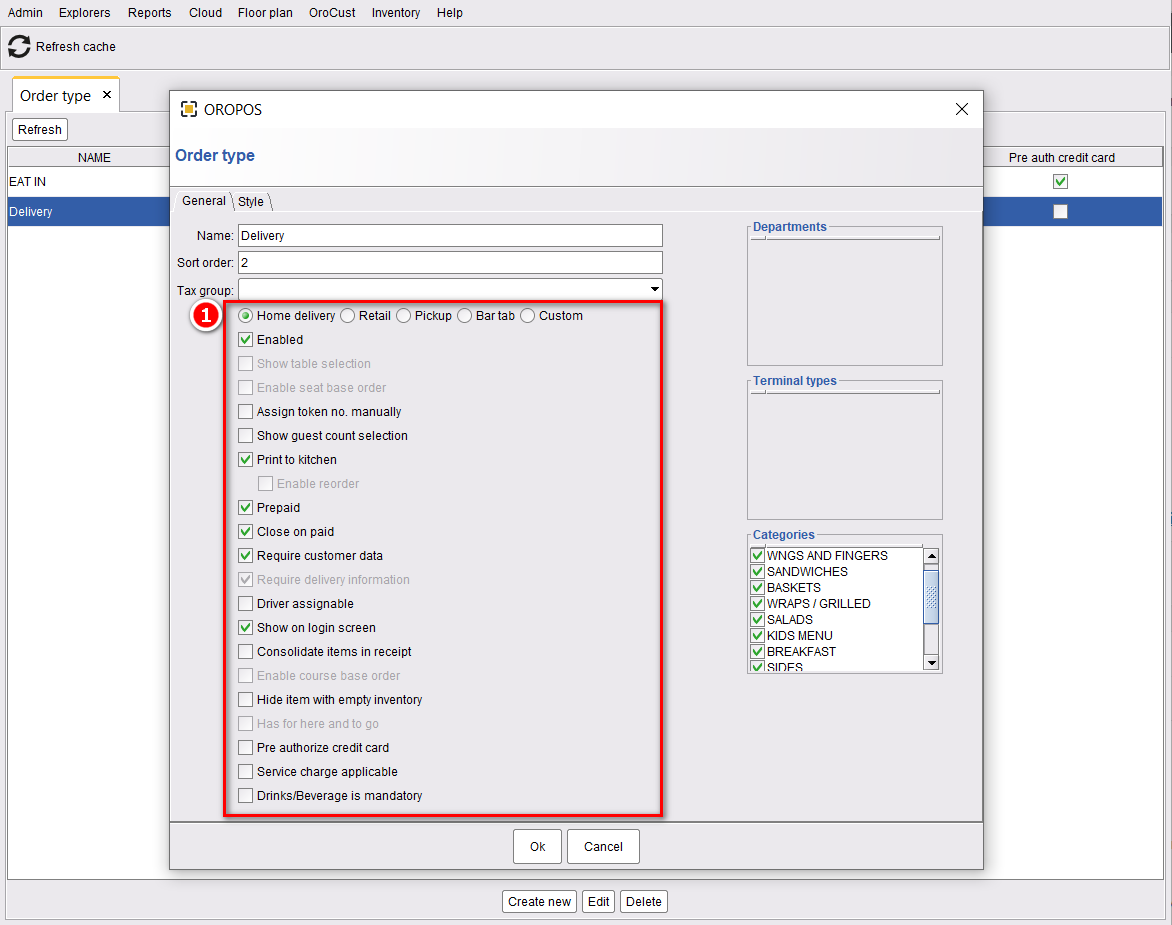
- Turn on these features to take delivery orders in any order type.
Two important parameters are
- Require customer data: This will prompt to save Name, Phone, and Address for a new customer. If customer data is turned off store cannot use the reorder feature.
- Require delivery information: If customer data is turned off a store can bypass customer registration and create an order with any phone number.
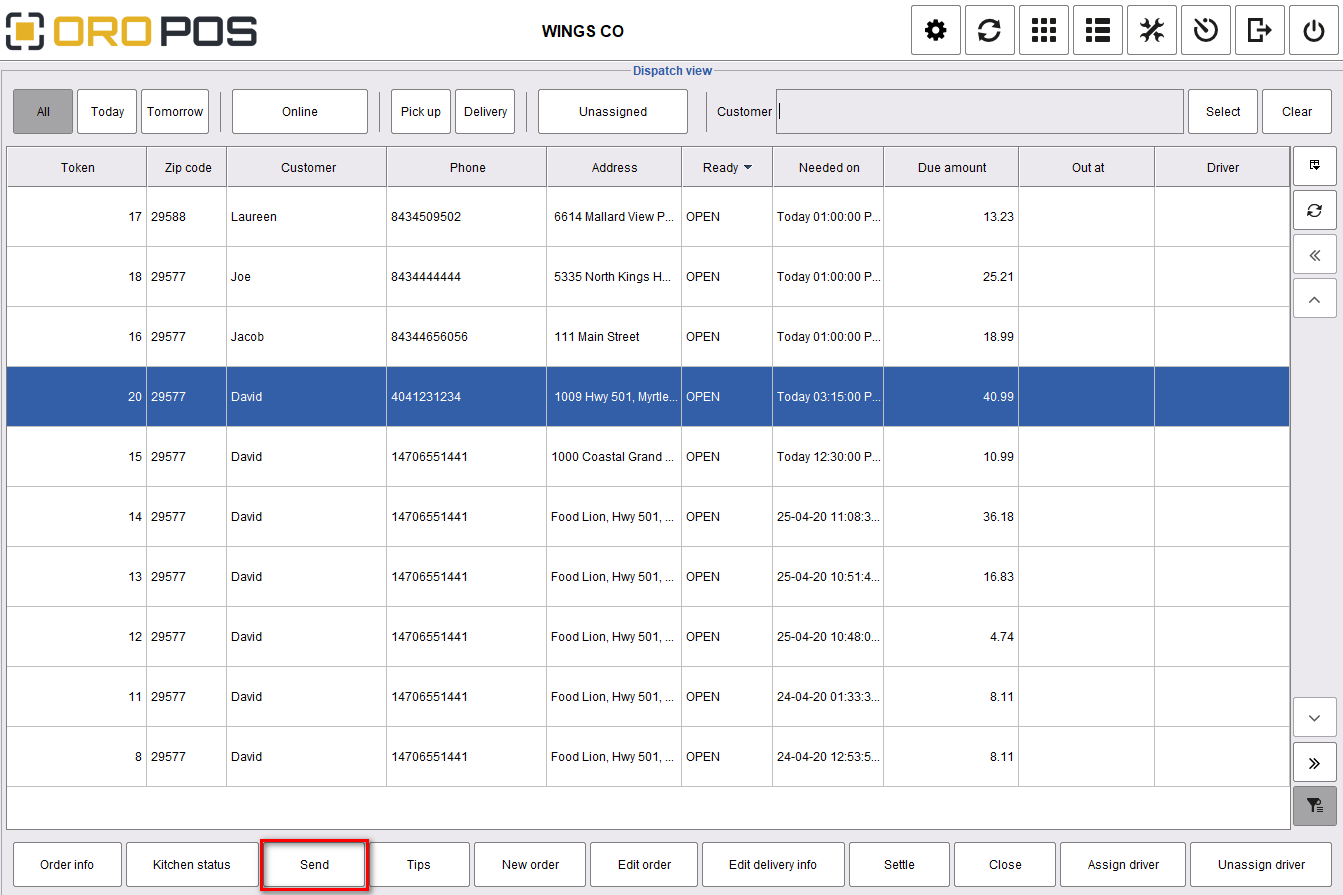
Delivery Dispatch view
From the delivery dispatch view a store can create/receive an order from multiple sources. If the store uses Caller ID devices, it can receive phone-based order. In some cases, a cashier can manually enter the order. The latest version of ORO POS has plugins to receive orders from menugreat.com
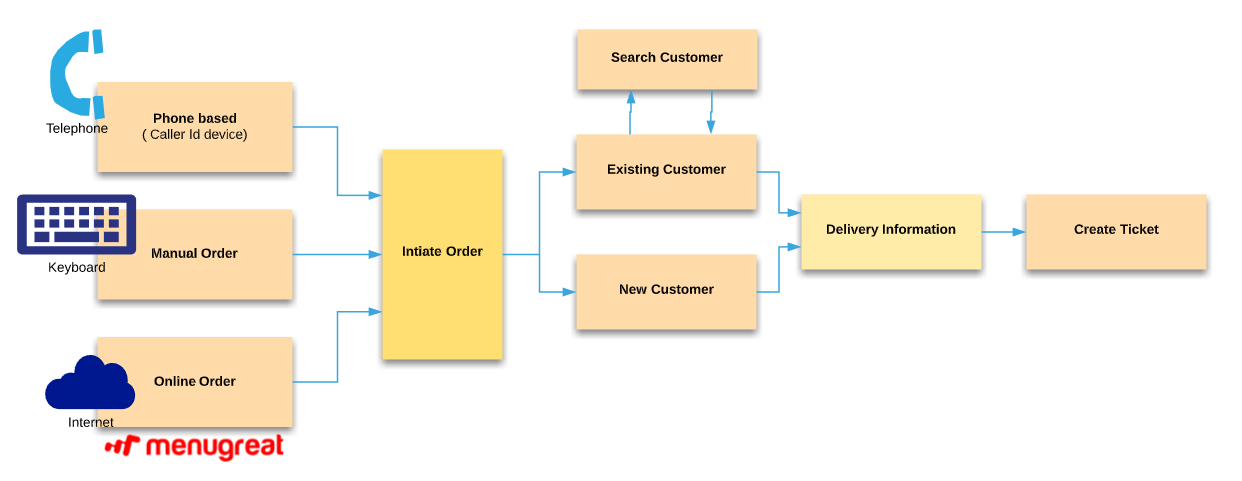
Click on the delivery order type button on the home screen.
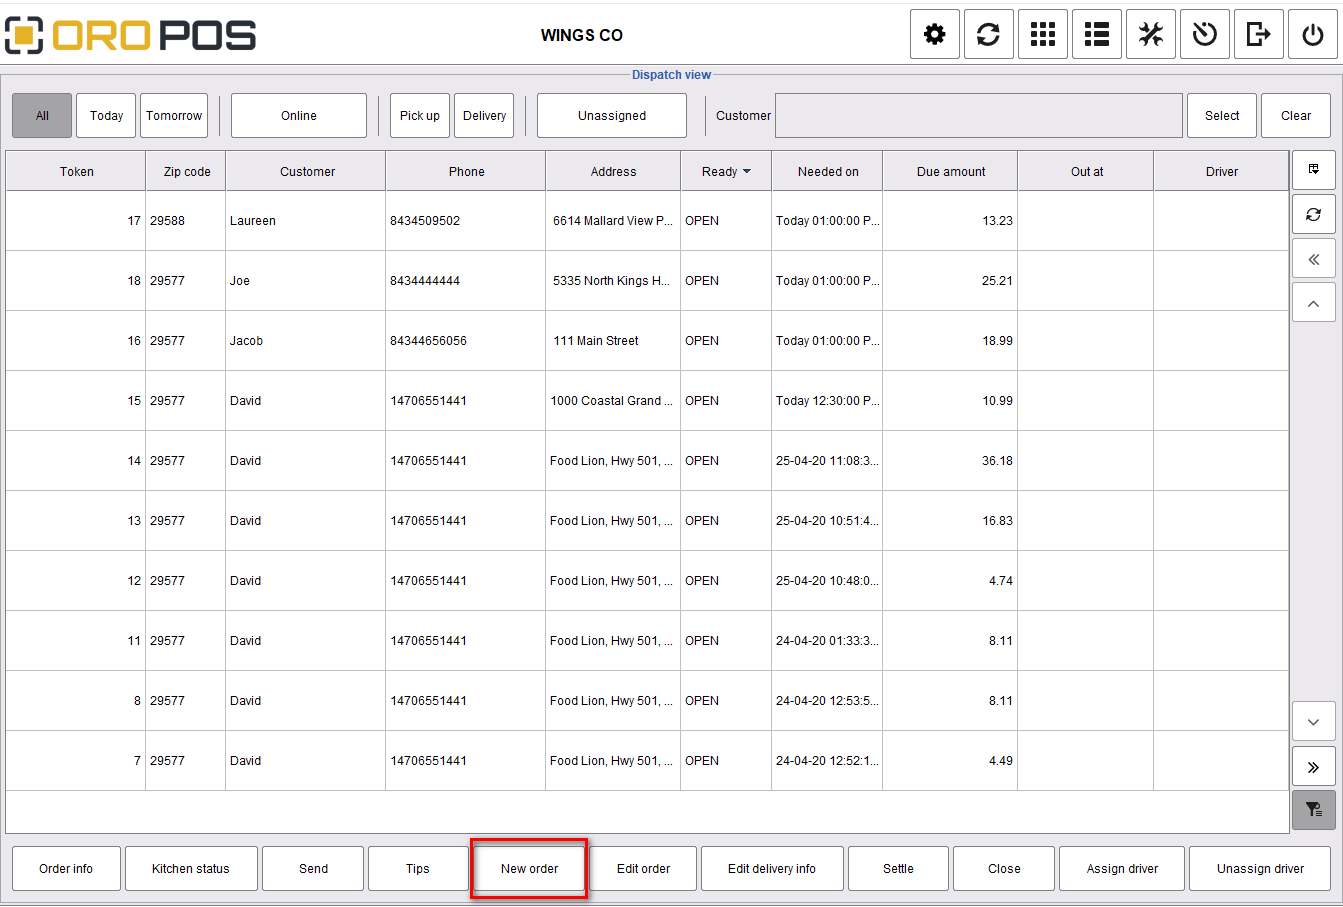
Initiate a new Order
| Channel | Required Device/Software | Description |
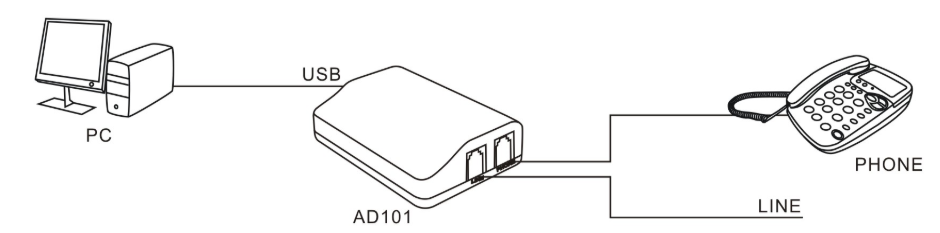
| Phone | Caller Id device |
We recommend WhozzCalling Ethernet adapter for the best performance. Cust plugin usually detects that adapter automatically. ARTECH AD101 Caller Id is low-cost device with only one line.
When a new order comes the caller-ID device should show a new button
|
| Manual | – | The user clicks on a new order button and searches from existing customers. If the customer is not found he register the customer as follows. |
| Online Order | – Menugreat.com account – Connector plugin | This is described here Online Ordering with Menugreat |


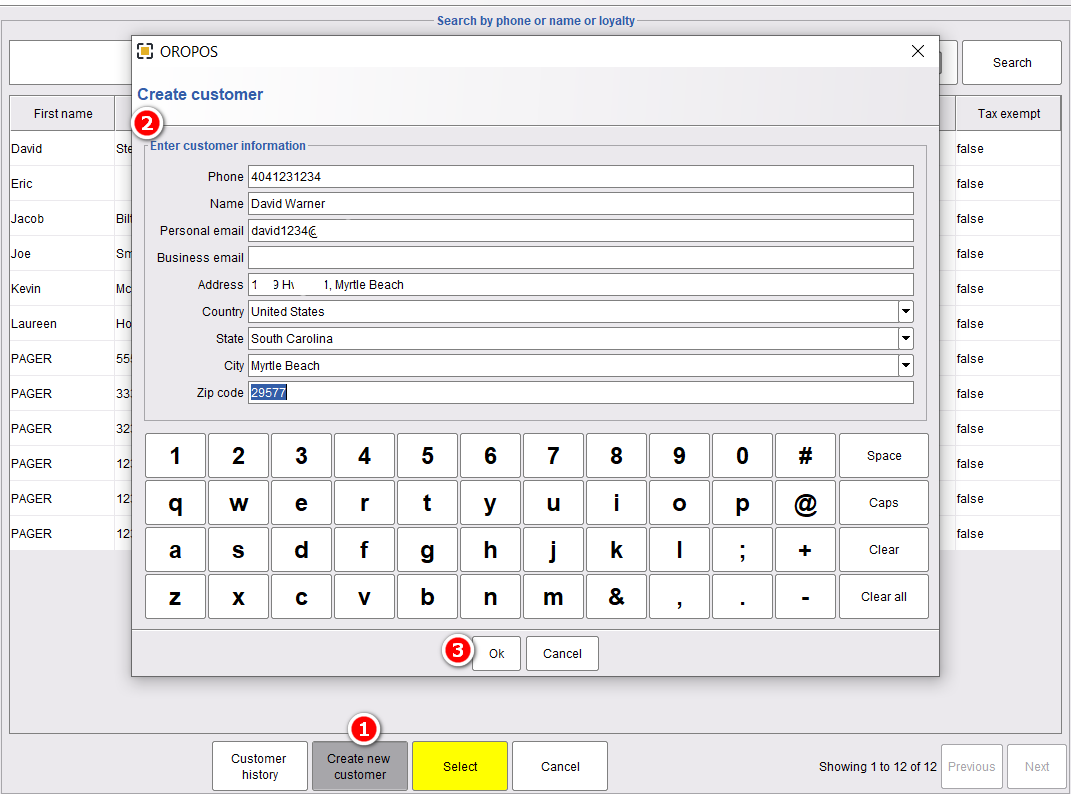
- Click on Create New Customer to take new customer order.
- Enter customer’s information.
- Press OK to save the changes and go to the next page.
Enter Delivery Information
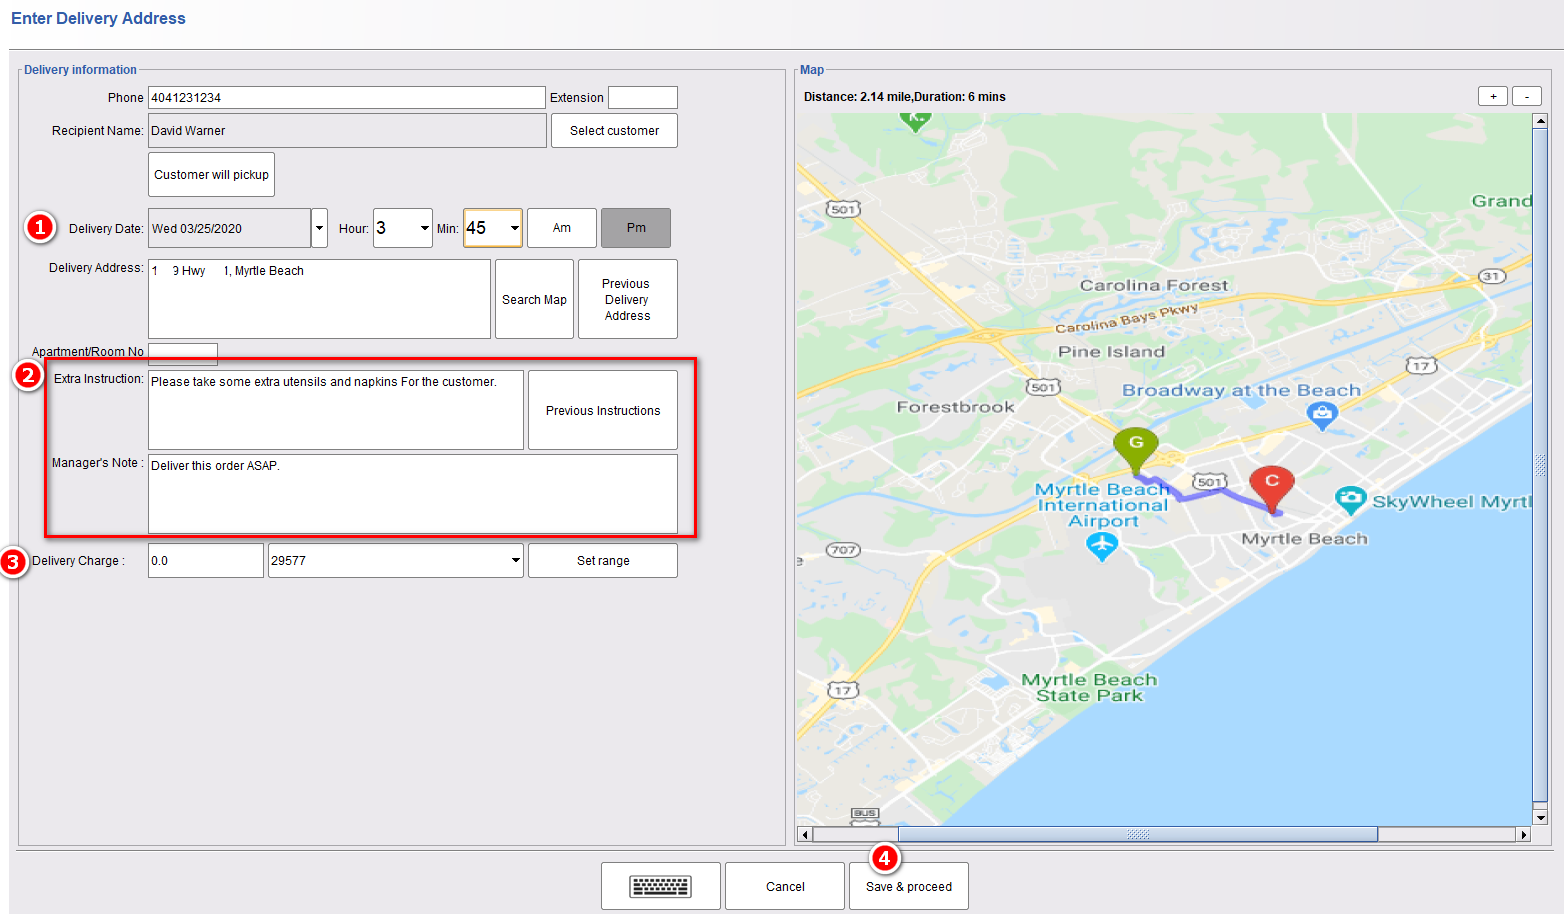
- Enter or adjust the Delivery Date and Time.
- Insert any Extra Instruction from the customer and manager.
- Delivery Charge for the delivery. You can automate this depending on the distance, from the cust configuration.
- Save & Proceed to the order taking page.
Cust plugin uses Google Map API, that requires internet presence and may not work in some of the places.
Enter Items in the ticket
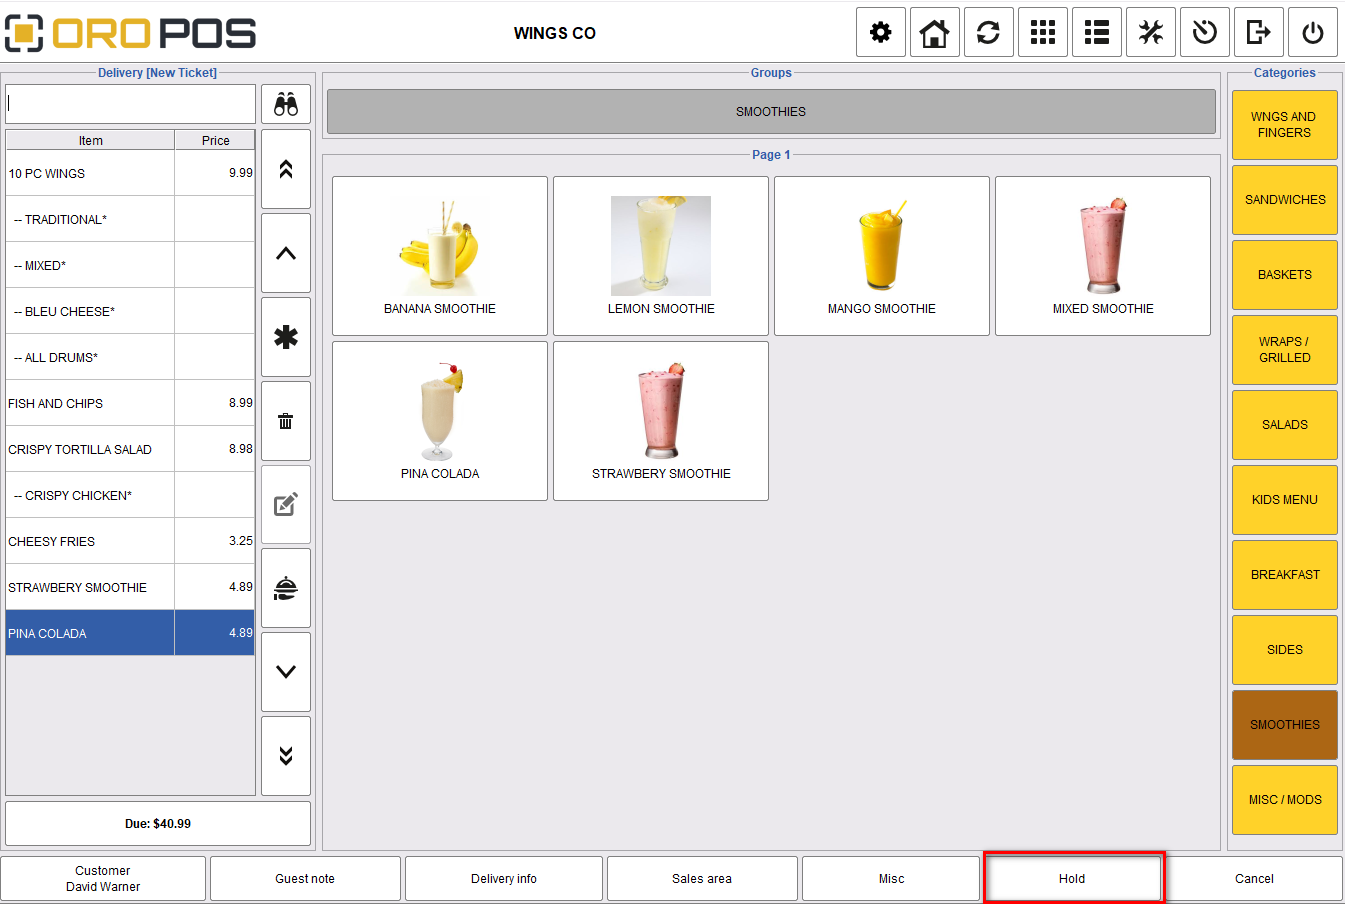
Now once you select all the menu items of the order click on Hold to go to the next step.
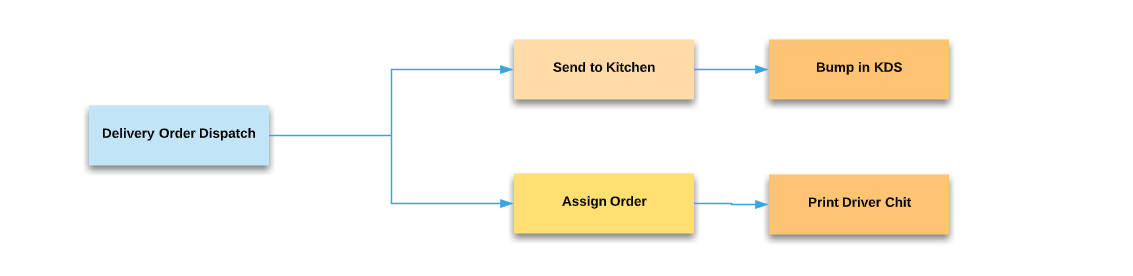
Order Assign and Kitchen Management
When an order has been received the manager will do the following tasks.
- Select order and send it to Kitchen.
- Bump from the Kitchen from KDS.
- Assign driver.
- Print Driver receipt from Order Info.
Sending Order To The Kitchen
After holding an order if you go to the delivery order type you will get your order there. From there, you can send the order to the kitchen and once the kitchen is done making the order you can check the order status too.
Once an order is sent to the kitchen status will be like the following,
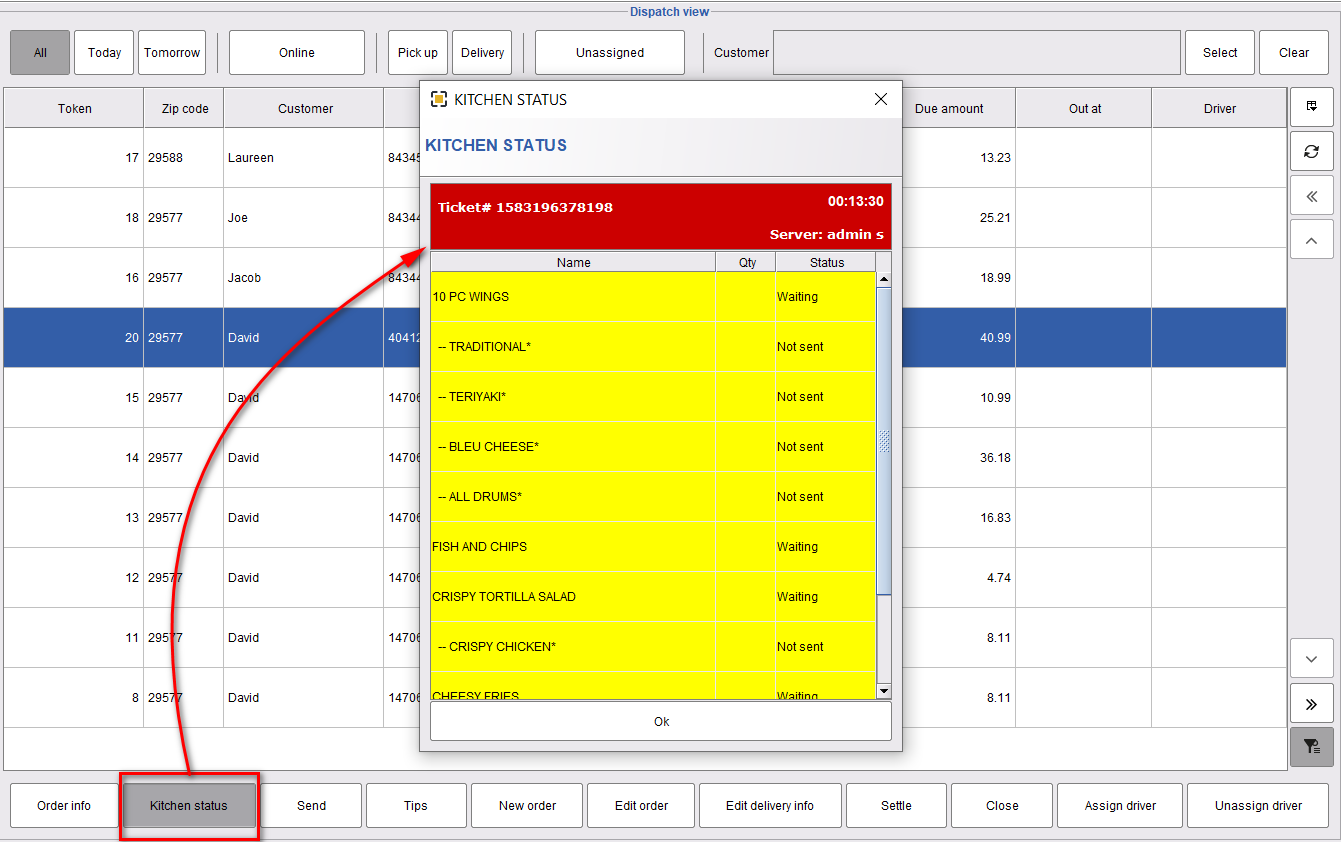
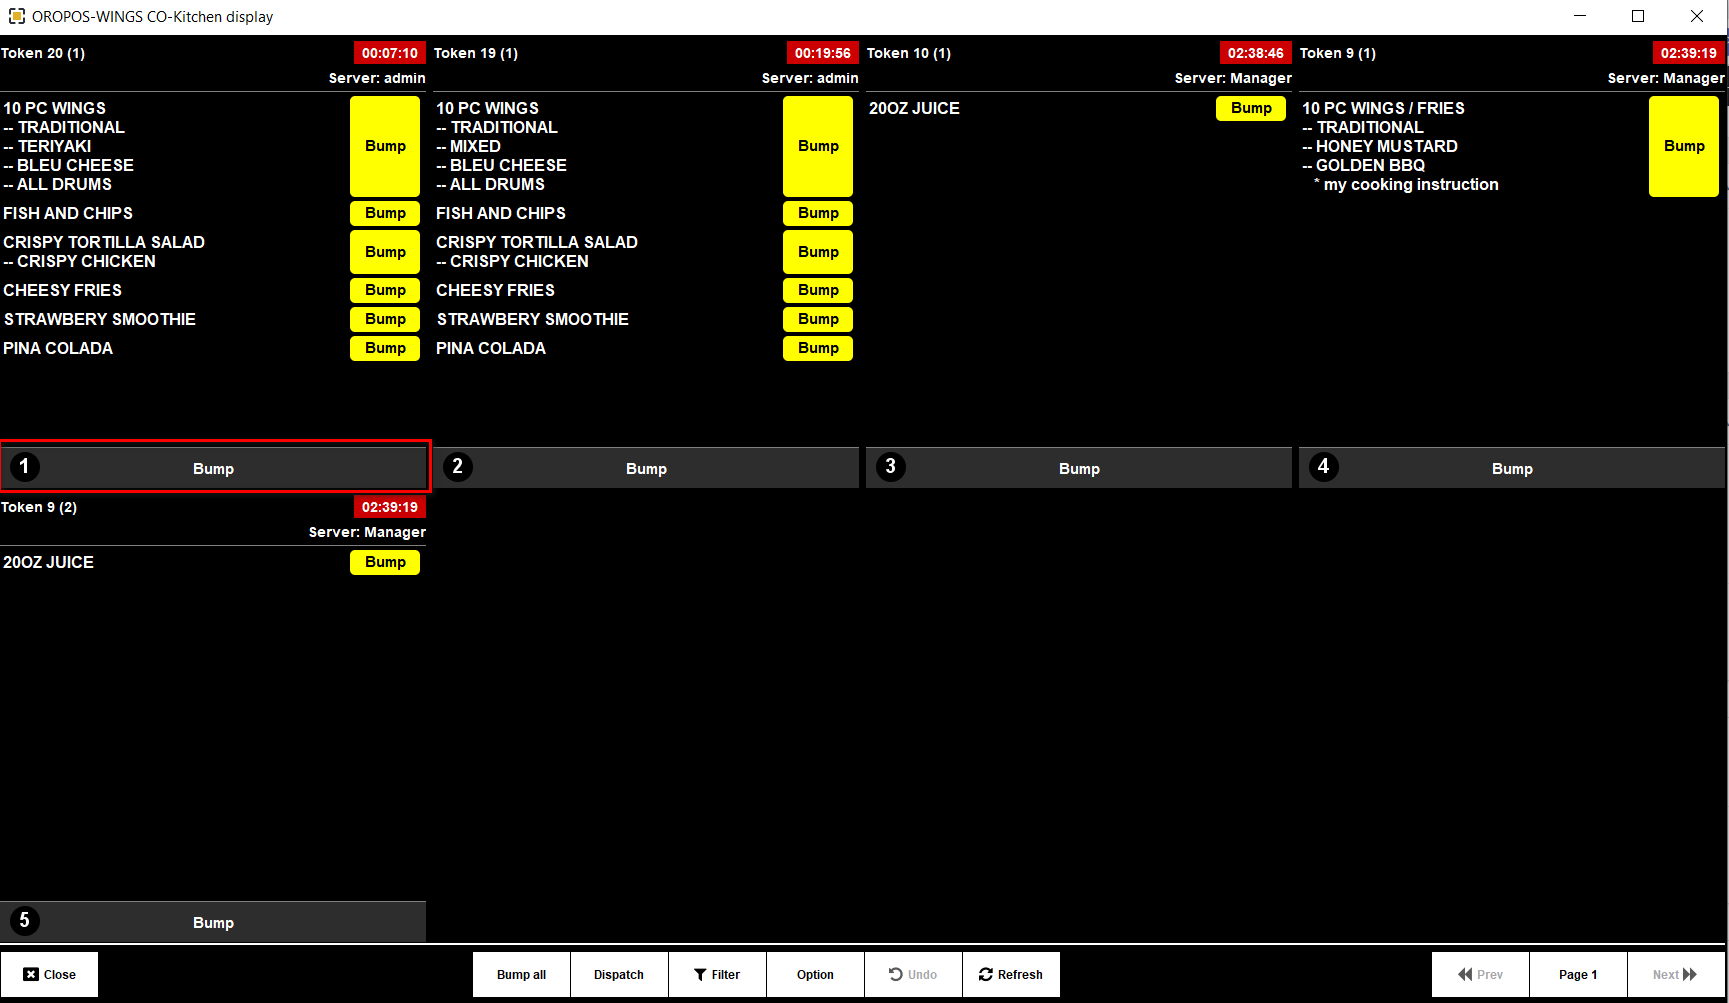
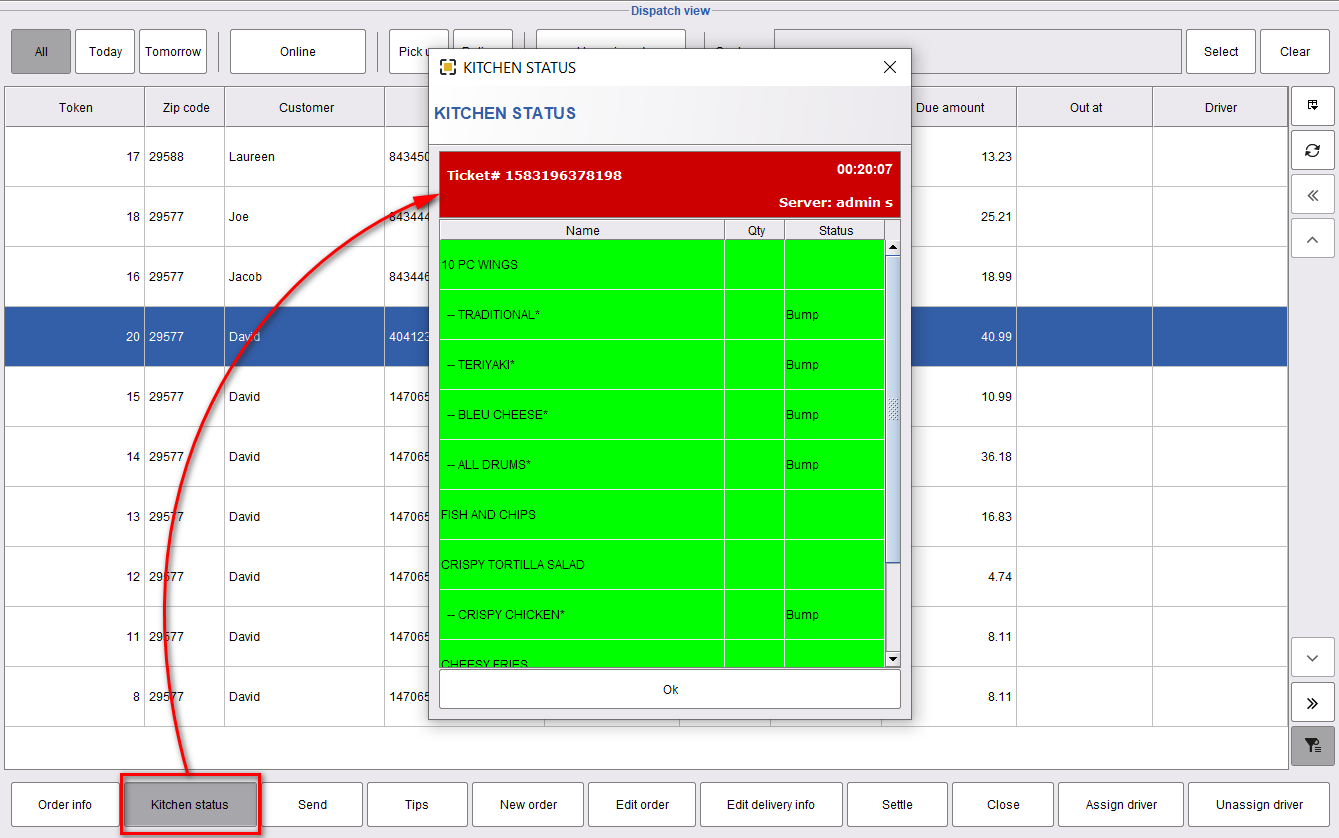
Bump Order in KDS
If you have a Kitchen Display you can Bump an order and then the order will show the following Kitchen Status.
Assigning Driver to the Orders
After the kitchen is done preparing an order, you can assign a driver. If drivers are already logged into the POS, you will find them by clicking on the Assign Driver button. From there, you can choose a driver and assign the order.
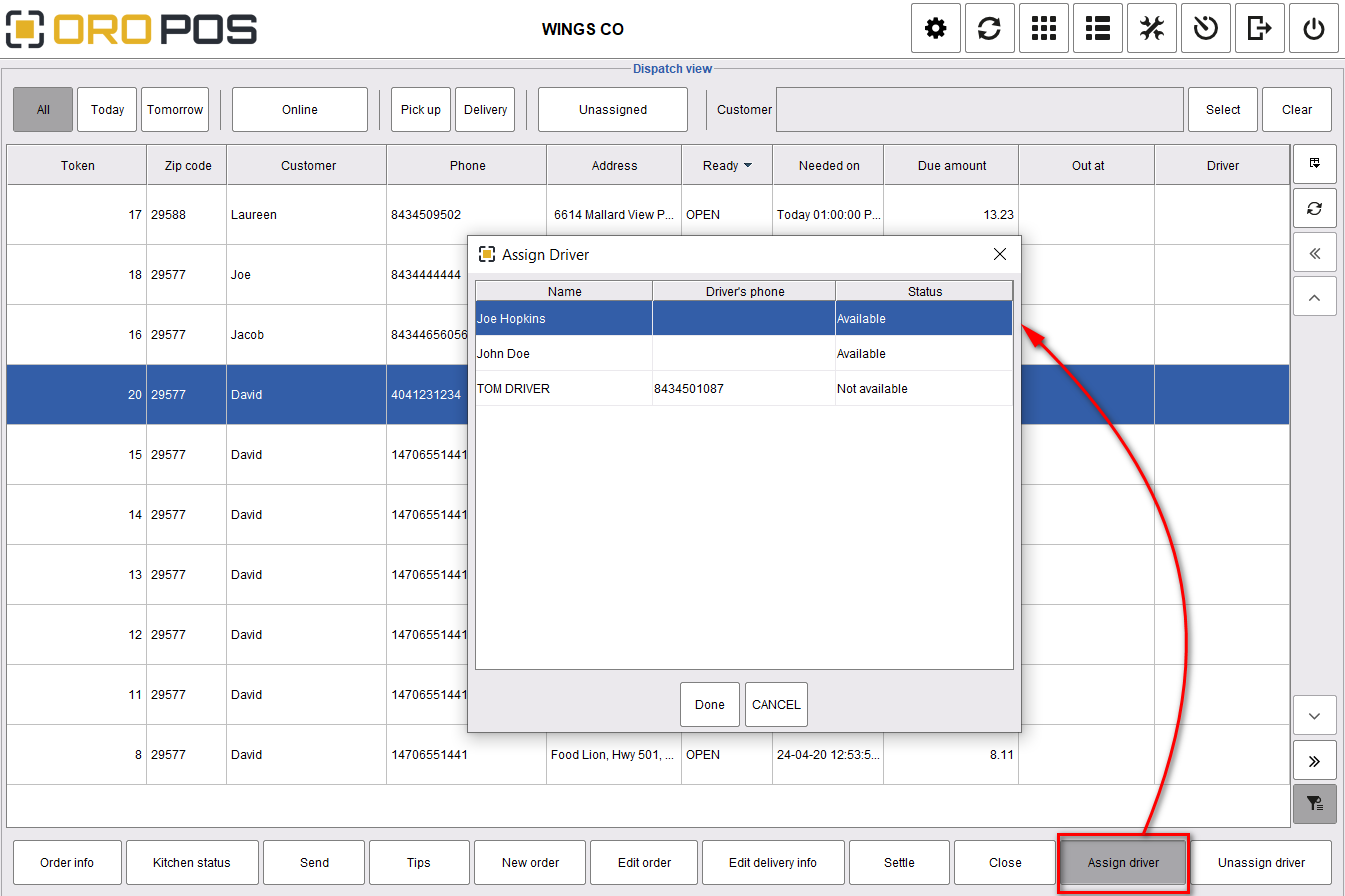
Driver’s can also login to this page and assign orders to them.
Driver view
Drivers, who may have limited access to the POS, should log in to “Drivers View” and deliver his assigned ticket as follows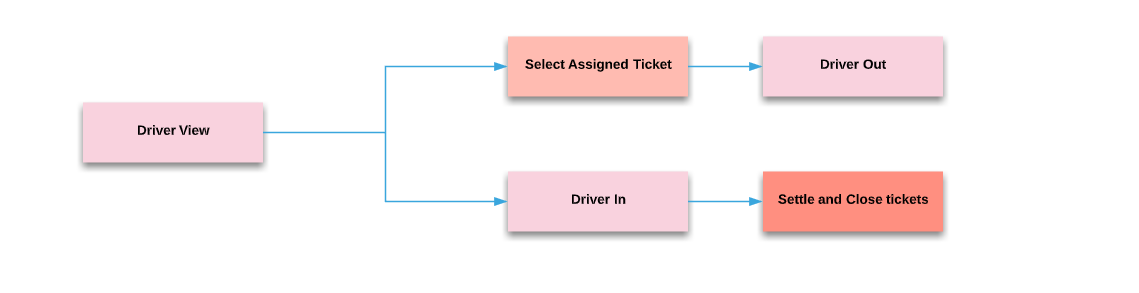
Select assigned orders and driver out
After assigning an order to a driver, drivers can go to the Driver View from the login page and take the orders to deliver by clicking on Driver Out.
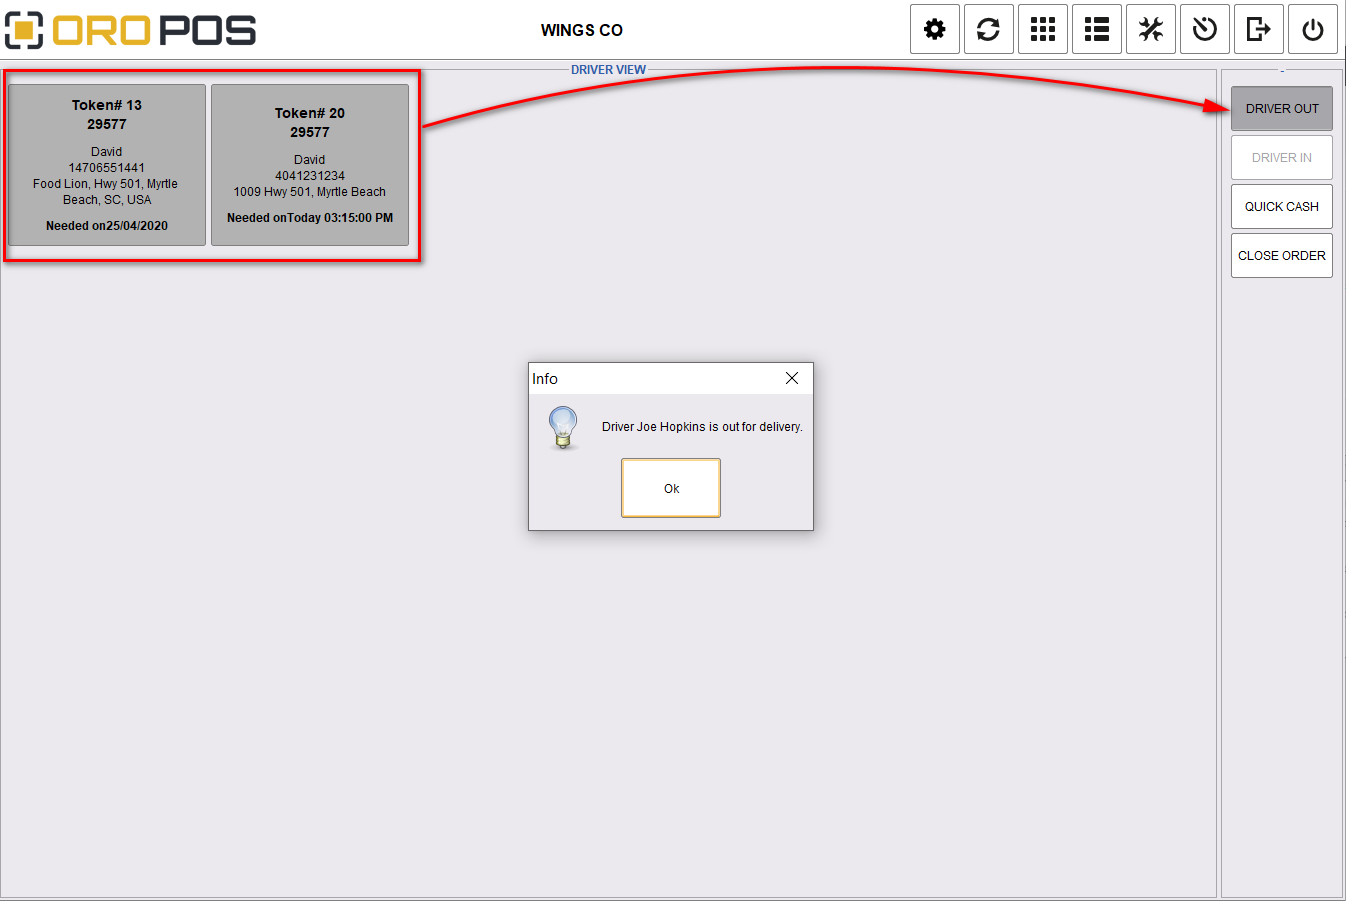
When this driver is out for deliveries, his status will become not available, and no new orders can be assigned to this driver.
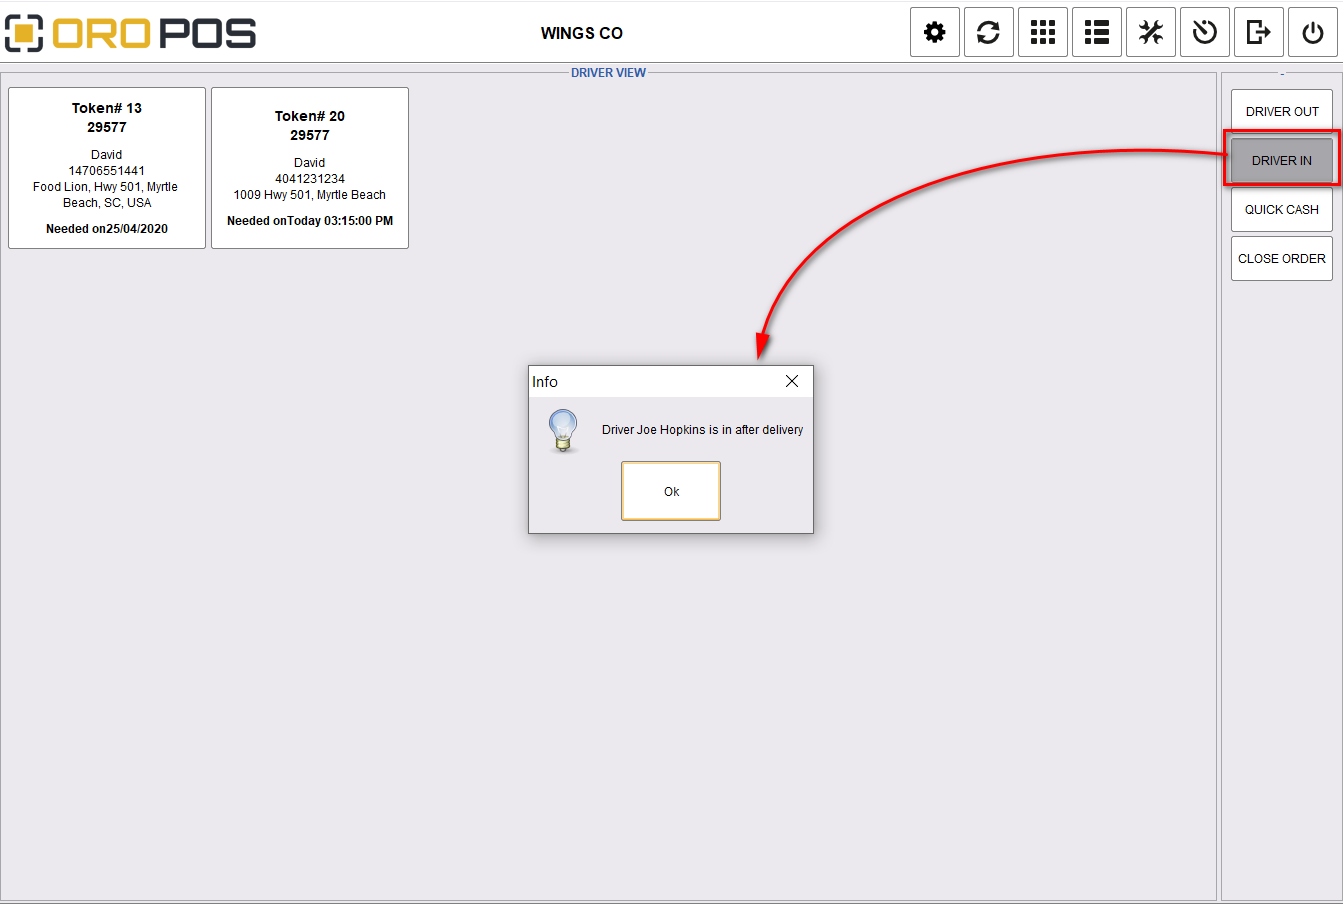
Drive In and Settle transactions
After delivery, drivers will come back to the store and let the store know, that he is available for delivery next order by clicking on the Driver In.
If the driver receives cash payment on delivery, they can close the tickets using Quick cash button. The money will be stored in their staff bank account and before ending their shift, they will be responsible for the order’s amount.
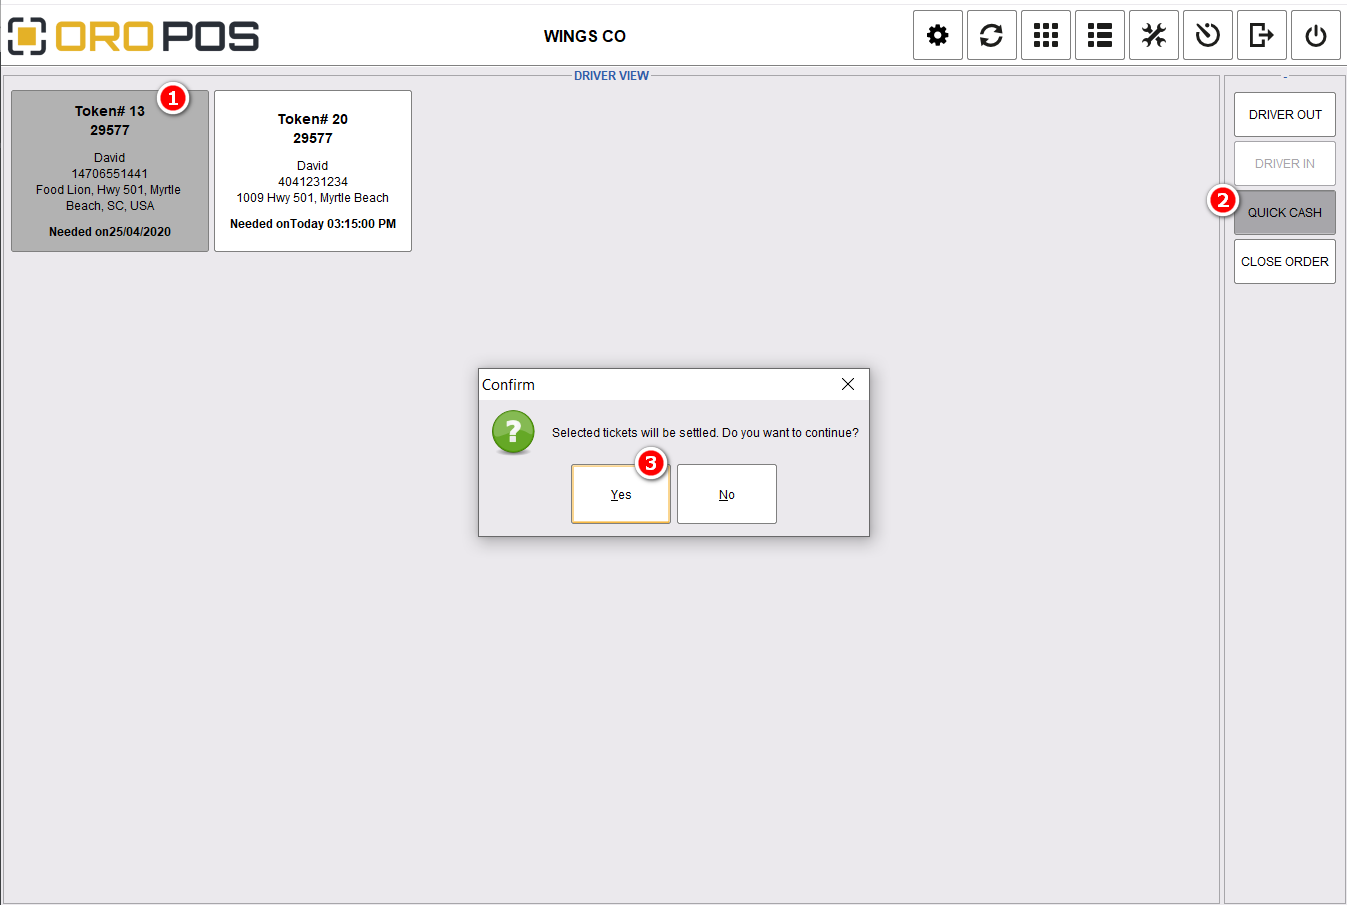
- Select the tickets which you want to perform the Quick Cash.
- Click on Quick Cash.
- Press Yes to perform the task.
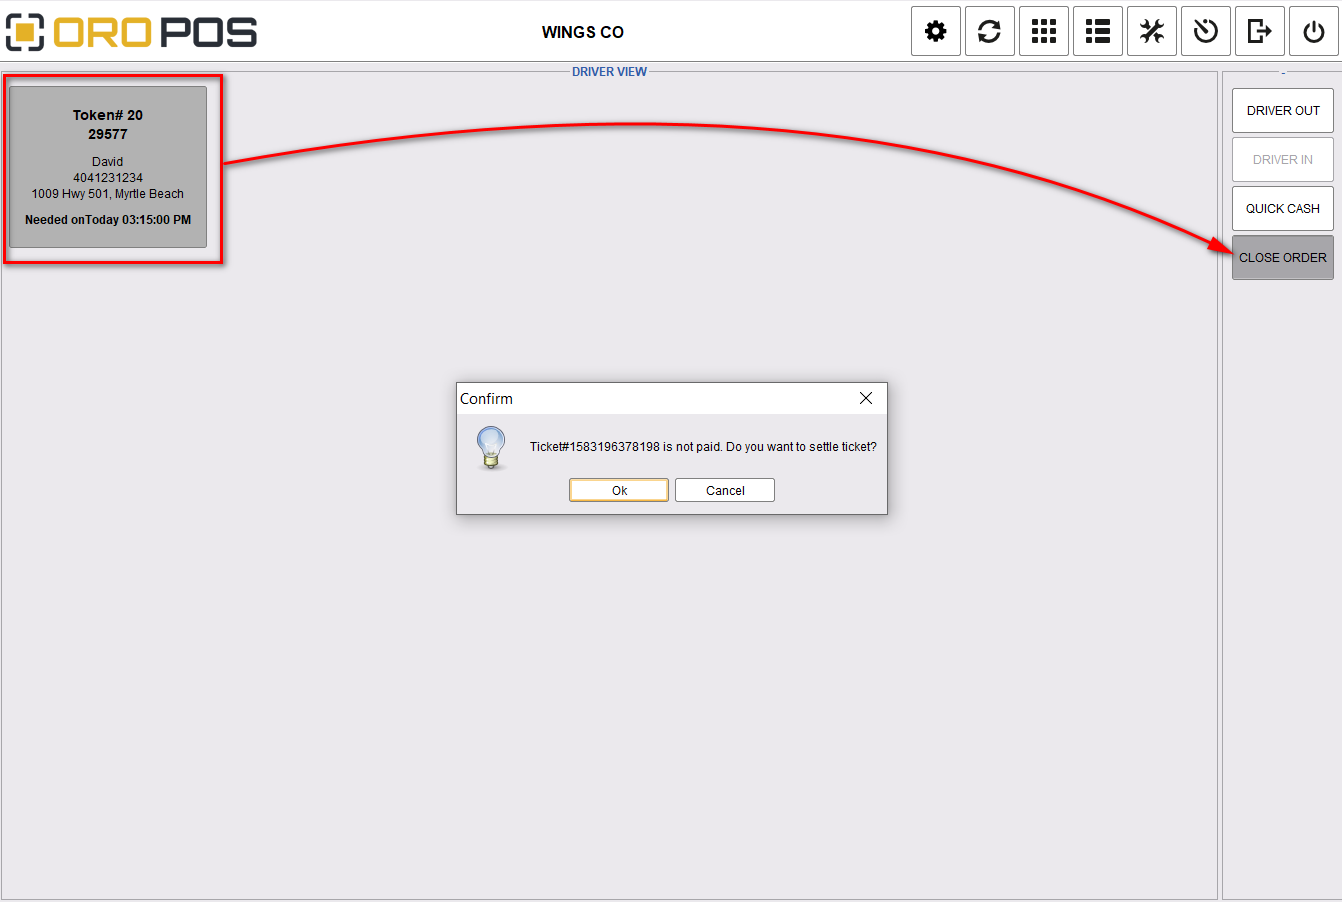
For all other cases use the Close Order button to settle a ticket from the ticket settlement screen.
From this ticket settle page, you can take an order using the following payment methods.
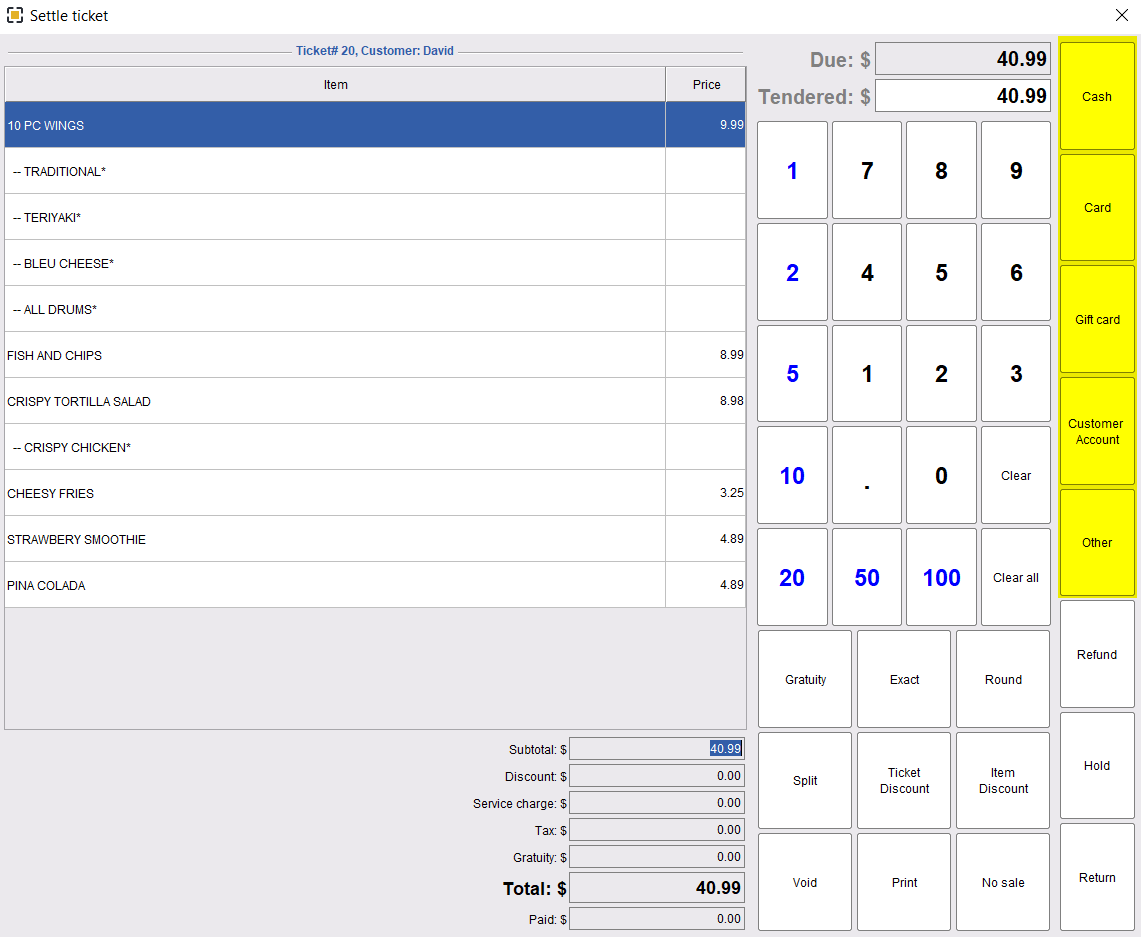
In your Store configuration, you need to set tips rules.