

🔧 Configuring Cash Drawer (Hardware Setup)
A cash drawer is the physical till that opens automatically when you take cash payments. This guide covers the hardware setup — how to physically connect a cash drawer to ORO POS and configure it.
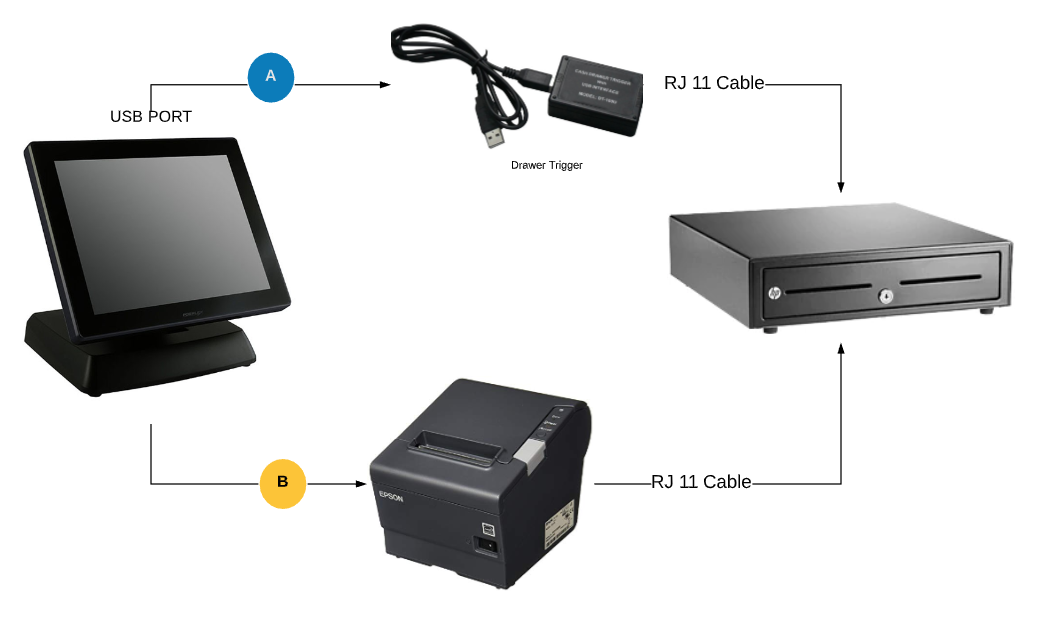
Two ways to wire a cash drawer to ORO POS: through the receipt printer (most common) or through a USB drawer trigger. Plug it in, configure the terminal, drawer pops on every cash sale.
🔌 Two Ways to Connect a Cash Drawer
| Method | How It Works | Best For |
|---|---|---|
| 🖨️ Via Receipt Printer | RJ11 cable from drawer plugs into the back of the printer. Printer kicks the drawer. | Most stores (recommended) |
| 🔌 Via USB Drawer Trigger | USB-to-RJ11 adapter connects drawer directly to the POS computer. | Stores without ESC/POS-compatible printer |
📐 Visual: Hardware Diagrams
Method 1: Cash Drawer → Printer → POS
💵
CASH DRAWER
RJ11 cable
🖨️
RECEIPT PRINTER
USB / Network
💻
POS TERMINAL
Method 2: Cash Drawer → USB Trigger → POS
💵
CASH DRAWER
RJ11 cable
⚡
USB DRAWER TRIGGER
USB
💻
POS TERMINAL
🖨️ Method 1: Cash Drawer Connected to Printer
Most ORO POS users connect the cash drawer through the receipt printer. Simple, reliable, fewer USB ports used.
Setup Steps
| Step | Action |
|---|---|
| 1 | Set up your receipt printer first (drivers, Windows install) |
| 2 | Plug the RJ12/RJ11 cable from cash drawer into the back of the printer (looks like a phone jack) |
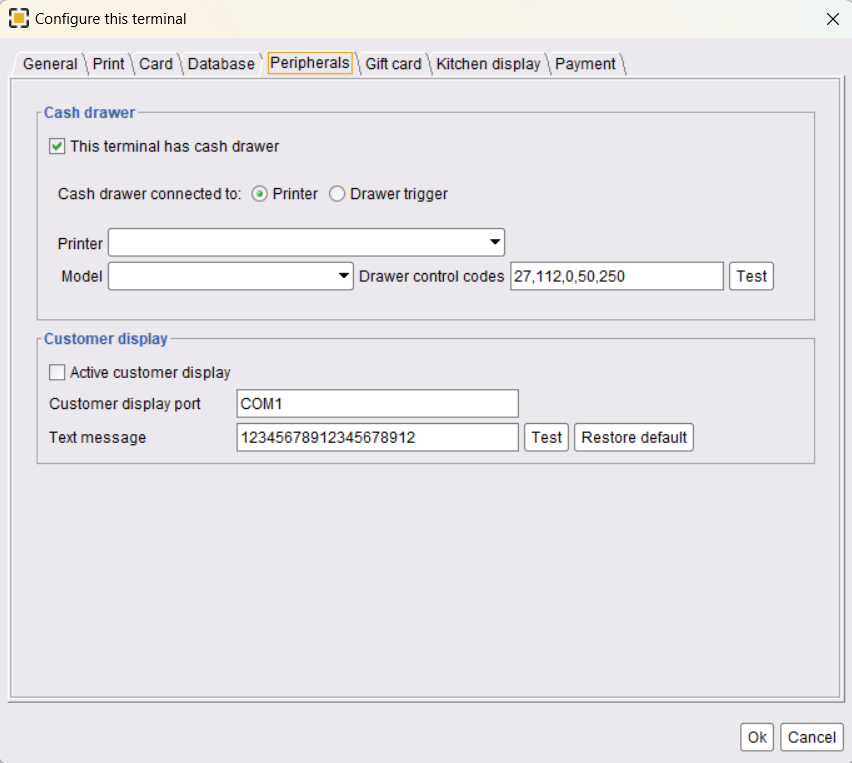
| 3 | In ORO POS go to Back-Office → Admin → Terminal Configuration → Peripherals |
| 4 | Tick “This terminal has a cash drawer” |
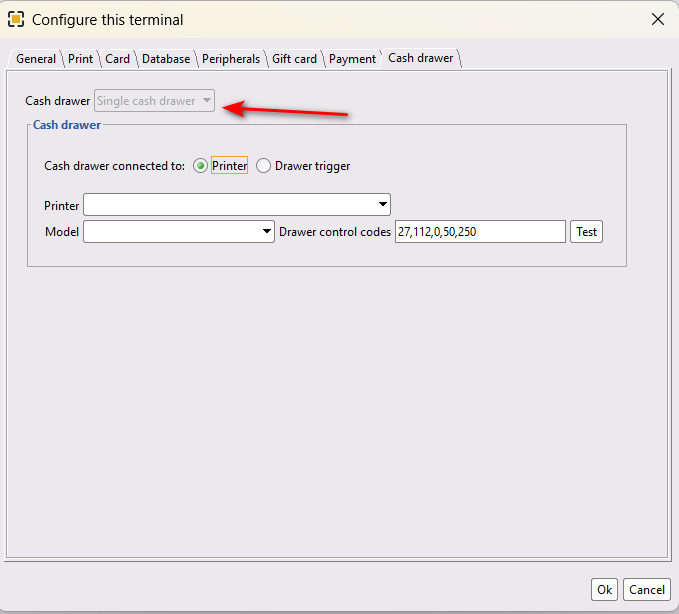
| 5 | Select Connected to: Printer |
| 6 | Choose your printer device from dropdown |
| 7 | Enter drawer control code: 27,112,0,25,250 |
| 8 | Click Test — drawer should kick open |
| 9 | Click OK to save and restart POS |
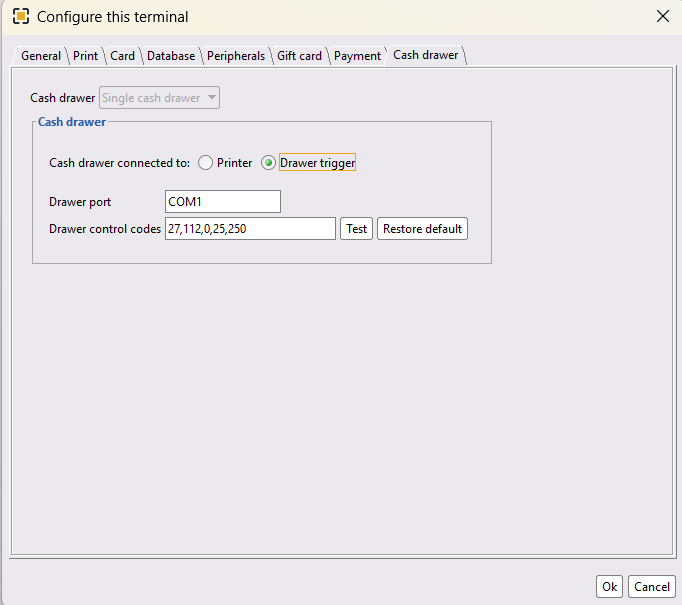
🔌 Method 2: Cash Drawer Connected via USB Drawer Trigger
Method 1 (via printer) works for most stores. Use the drawer trigger only if:
- 🚫 Your store doesn’t use a receipt printer
- 🚫 Your printer doesn’t support ESC/POS commands
- 🚫 You want a backup direct connection
Setup Steps
- Install the USB drawer trigger driver — it creates a virtual serial port (COM3, COM4, etc.)
- Plug the drawer’s RJ11 cable into the trigger
- Plug the trigger’s USB into the POS terminal
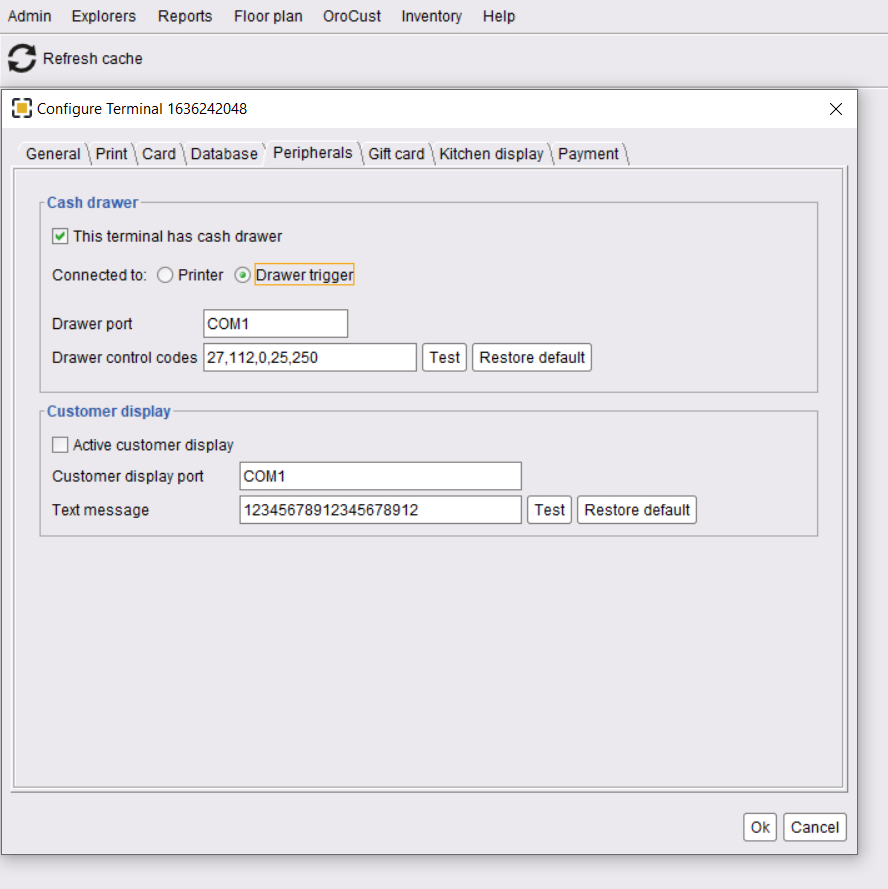
- Go to Back-Office → Admin → Terminal Configuration → Peripherals → Drawer Trigger
- Select the correct virtual serial port
- Save and restart the POS
📟 Drawer Control Code Explained
The “drawer control code” is a special ESC/POS command that tells the printer (or trigger) to kick the drawer open. Different drawers may need different codes.
Most Common Code
27,112,0,25,250
This works for most cash drawers (Star, Epson-compatible, etc.). If your drawer doesn’t pop:
- 📞 Ask your hardware vendor for the correct code
- 🔍 Check the drawer’s manual
- 🧪 Try variations:
27,112,1,25,250(uses drawer pin 5 instead of pin 2)
🆕 v1.5+: No / Single / Dual Cash Drawer Modes
Updated screenshots and the “Cash Drawer” button on the Configure Terminal window:
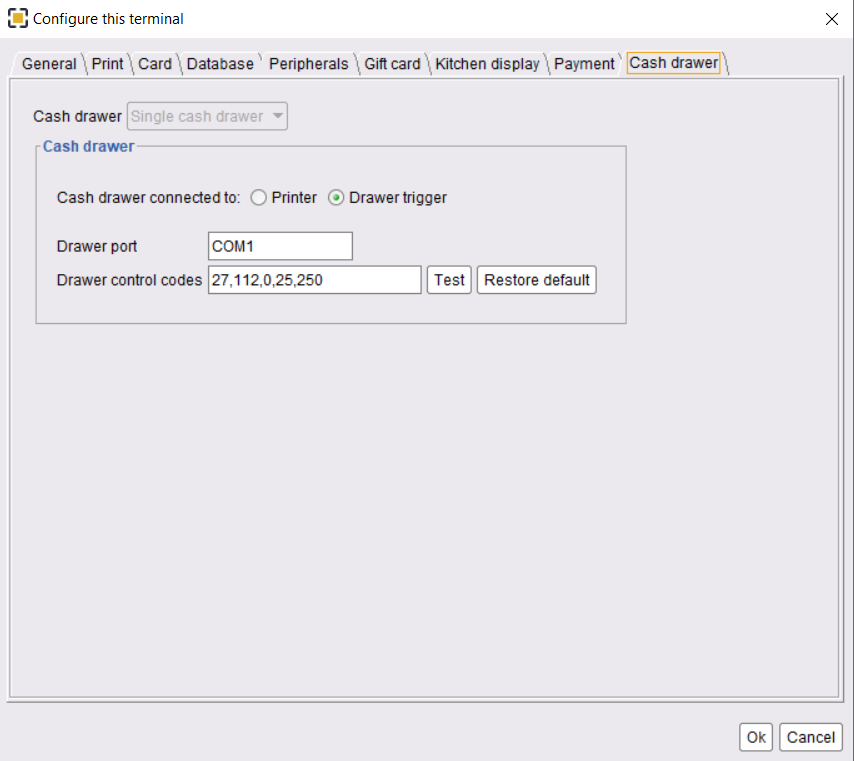
v1.5+ added three modes in Back-office → Admin → Terminal Configuration → Cash Drawer:
| Mode | What It Means | Best For |
|---|---|---|
| 🚫 No Cash Drawer | Terminal has no drawer at all. Tickets can be created but cash payments require a staff bank. | Server stations / mobile terminals |
| 1️⃣ Single Cash Drawer | Standard one-drawer terminal. All payments go to it. | Most stores |
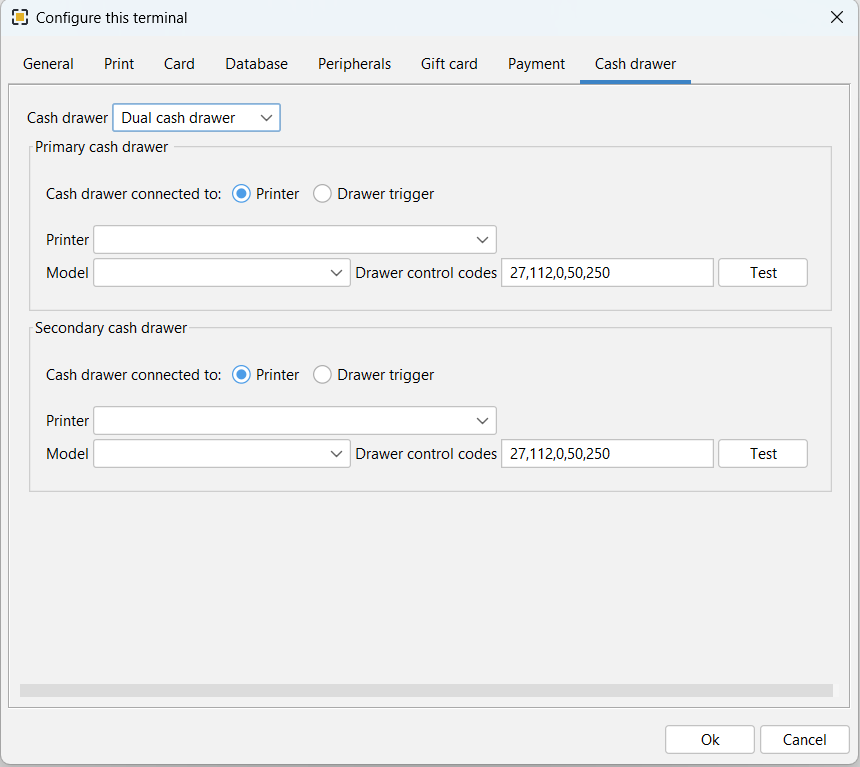
| 2️⃣ Dual Cash Drawer | Two drawers (primary + secondary), assignable to different cashiers. | High-volume / shift-rotation stores |
📌 No Cash Drawer (Mode 1)
If you select this mode:
- ❌ No “Assign Drawer” button on Clock In/Out dialog
- ✅ Tickets can still be created on the terminal
- ❌ Cash payments cannot be taken unless the user has an active staff bank
Best for: Order-taker terminals (no cash handling), mobile servers using staff banks
📌 Single Cash Drawer (Mode 2)
If you select this mode:
- ✅ One drawer assigned to one user
- ✅ All other users’ payments go to that same drawer (unless they have a staff bank)
- ✅ Standard, simple setup
📌 Dual Cash Drawer (Mode 3) — v1.6.5+
If you select this mode:
- ✅ Two drawers on one terminal — primary + secondary
- ✅ Each drawer assigned to a different user
- ✅ Locked drawer routes that cashier’s payments to it
- ✅ Other payments go to the unlocked drawer
This article covers hardware setup. For opening, closing, and reconciling cash drawers during operations (including how dual drawers swap), see:
🛠️ Troubleshooting
| Symptom | Likely Fix |
|---|---|
| Drawer doesn’t open at all | Try a different control code (27,112,1,25,250); check RJ11 cable seated firmly |
| Drawer opens during printing only, not on cash sale | Check ORO POS configuration: drawer trigger setting may be wrong |
| Test button works but normal sales don’t pop drawer | Restart POS after configuration changes |
| Drawer trigger not detected | Reinstall driver; check Windows Device Manager for COM port assignment |
| “Assign Drawer” button missing | Cash drawer mode set to “No Cash Drawer” — change to Single or Dual |
📚 Related Guides
| → Opening & Closing Cash Drawer | → Store Sessions Guide | → Receipt Printer Setup |
📞 Need More Help?
Visit guide.orocube.com or contact helpdesk@orocube.net