

📋 Inventory Purchase Order (PO)
A Purchase Order (PO) is a record of stock you’ve ordered (or received) from a vendor. ORO POS supports 2 ways to handle POs depending on how your store operates.
Go to Back-Office → Inventory → Purchase
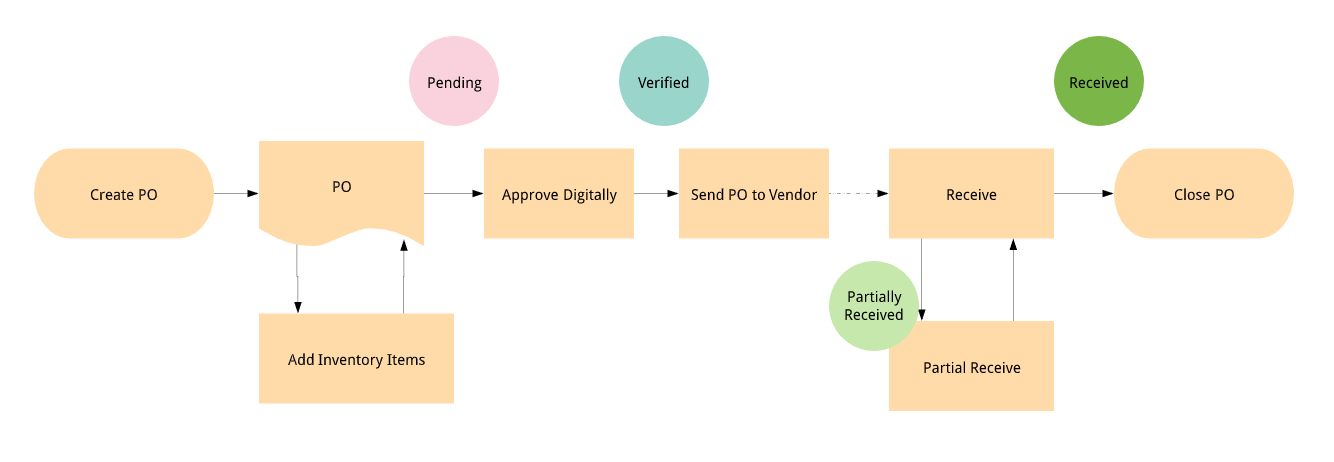
🎯 The 2 PO Modes
| Mode | When to Use | Best For |
|---|---|---|
| ⚡ Direct Purchase | Buy first, record after | Small stores, walk-in vendor purchases |
| 📨 Send PO & Receive | Order first, deliver later (with formal PO) | Large stores, regular suppliers |
⚡ Mode 1: Direct Purchase
You bought stock from a vendor (or local store), now you’re recording it after the fact. Stock is added immediately.
📌 Real Example
Owner ran out of buns at lunch rush. Drove to Costco, bought 100 buns for $30 cash. Now back at store, needs to record the purchase.
Steps
| Step | Action |
|---|---|
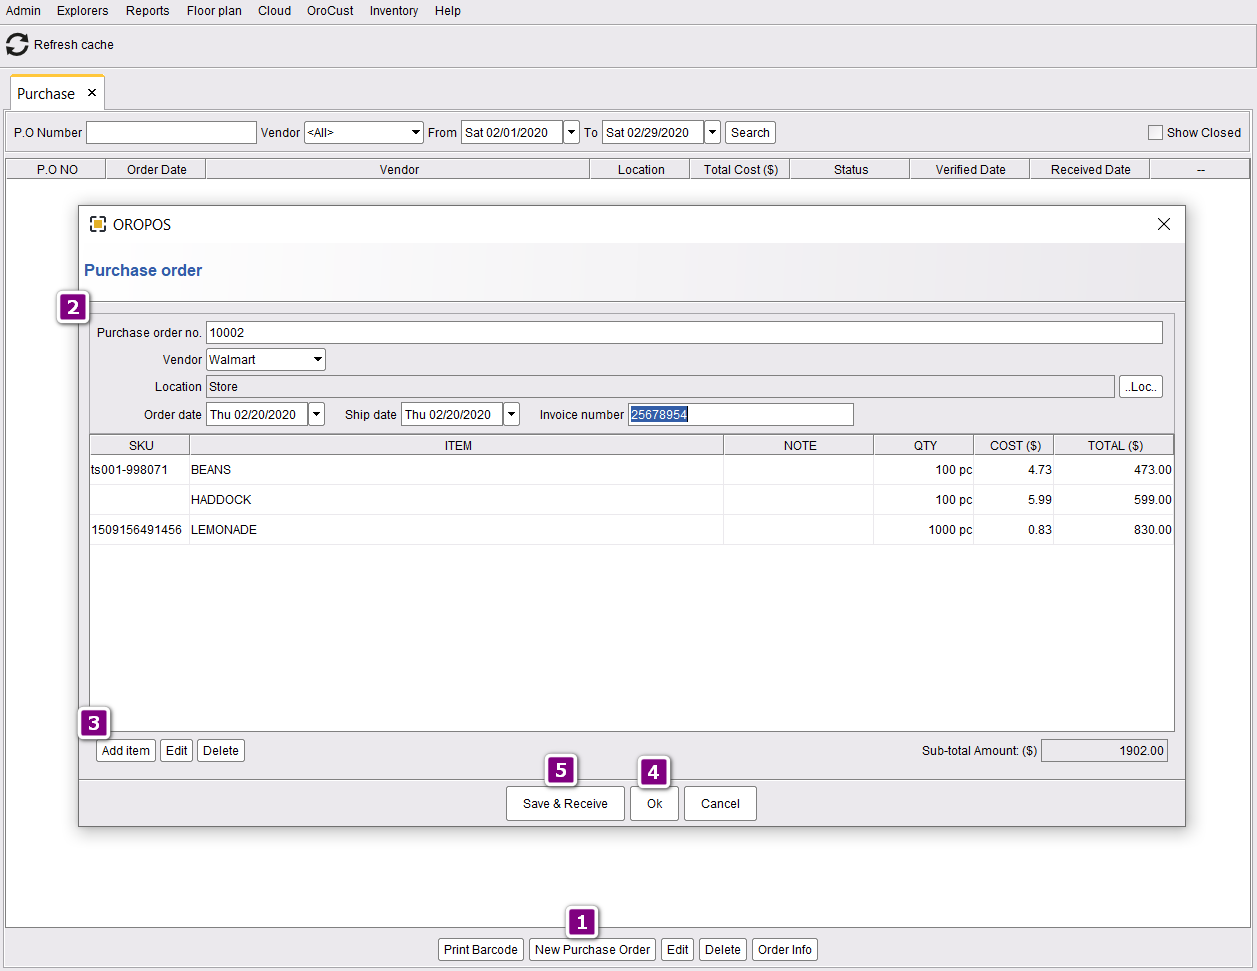
| 1 | Click New Purchase Order |
| 2 | Enter PO number, vendor, date, etc. |
| 3 | Add inventory items with quantities and costs |
| 4 | Click Save and Receive to fulfill immediately |
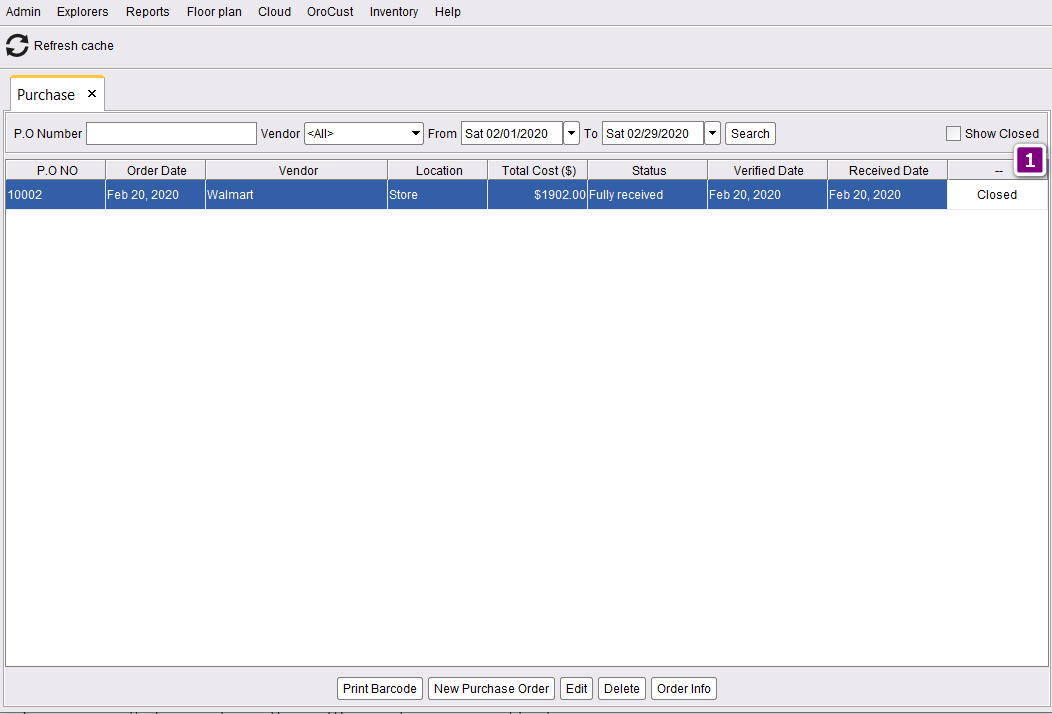
The PO is now marked as “Fully Received and Closed”:
If you want to save the PO and edit later (instead of receiving immediately), click Ok instead of Save and Receive.
📨 Mode 2: Send PO & Receive Later
You send a formal PO to your vendor, they ship it later. Track it from Pending → Verified → Sent → Received.
📌 Real Example
Restaurant manager prepares weekly PO for Sysco on Monday — listing meat, vegetables, dairy. Submits PO. Gets owner approval. Emails to Sysco. Sysco delivers Wednesday. Manager marks the items received in ORO POS.
🔄 Full Workflow
| Stage | Action | Status After |
|---|---|---|
| 1️⃣ Create | Manager creates PO with items | 📝 Pending |
| 2️⃣ Approve | Owner verifies PO | ✅ Verified |
| 3️⃣ Send | Email PO to vendor | 📤 Sent |
| 4️⃣ Receive | Mark items as received (full or partial) | 📦 Received / Closed |
Step 1: Create Purchase Order

- Click New Purchase Order
- Enter PO number, vendor, expected date
- Add all inventory items with quantities
- Click Ok to save
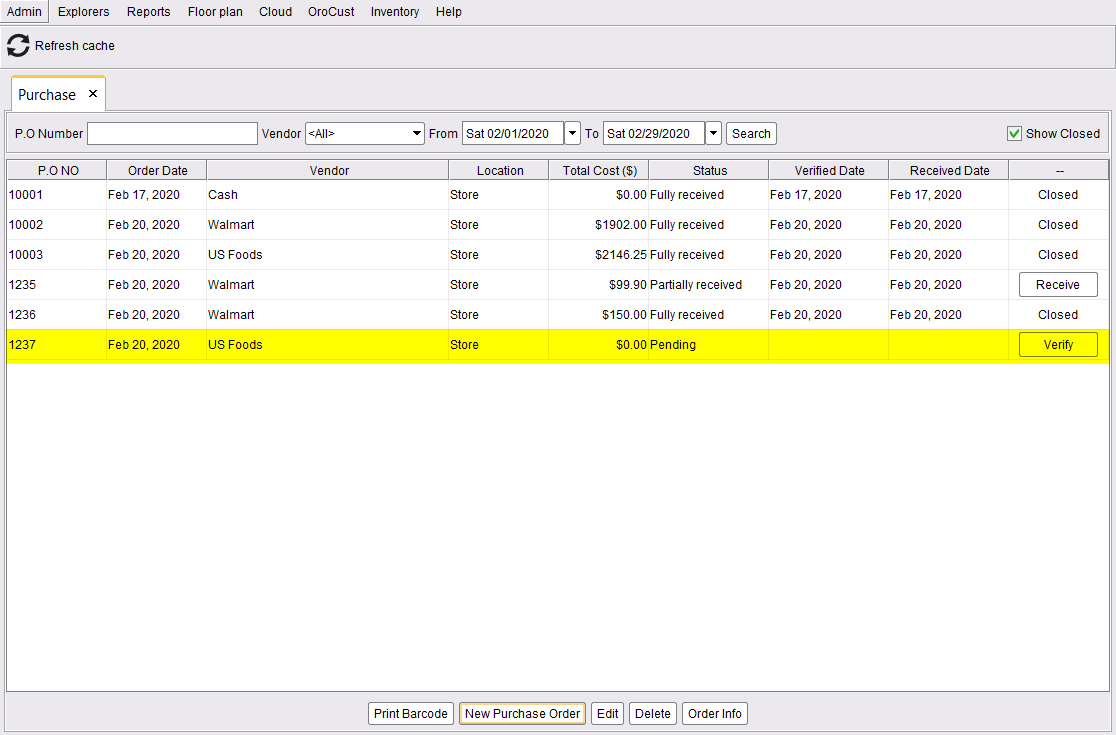
Status now shows Pending:
Step 2: Digitally Approve
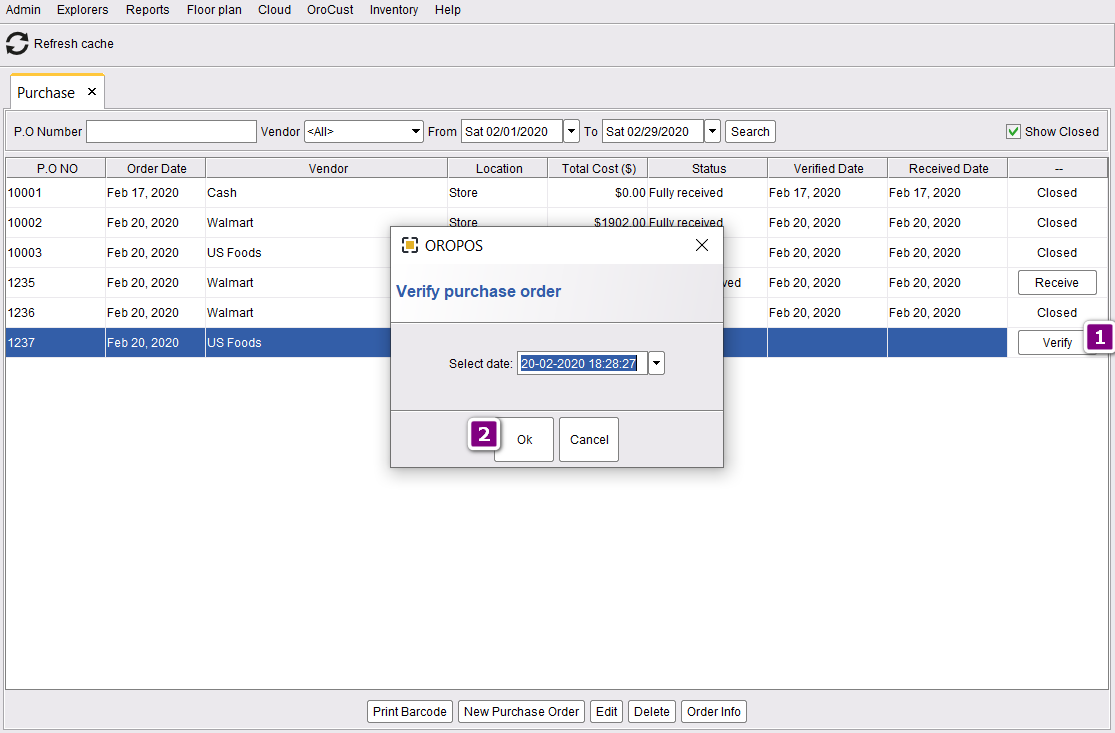
- Click Verify
- Confirm date/time → click Ok
Status now shows Verified:
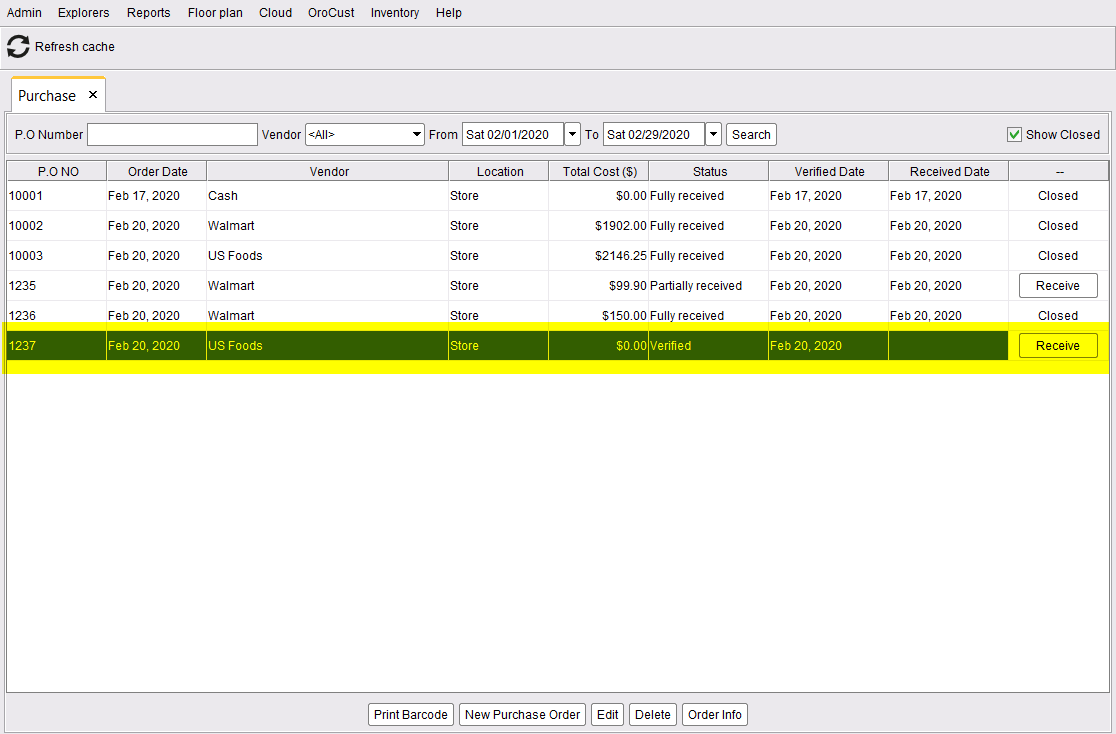
Approval prevents accidental orders. Often the manager creates POs but the owner verifies them before sending — adding a 4-eye check.
Step 3: Send PO to Vendor (Email)
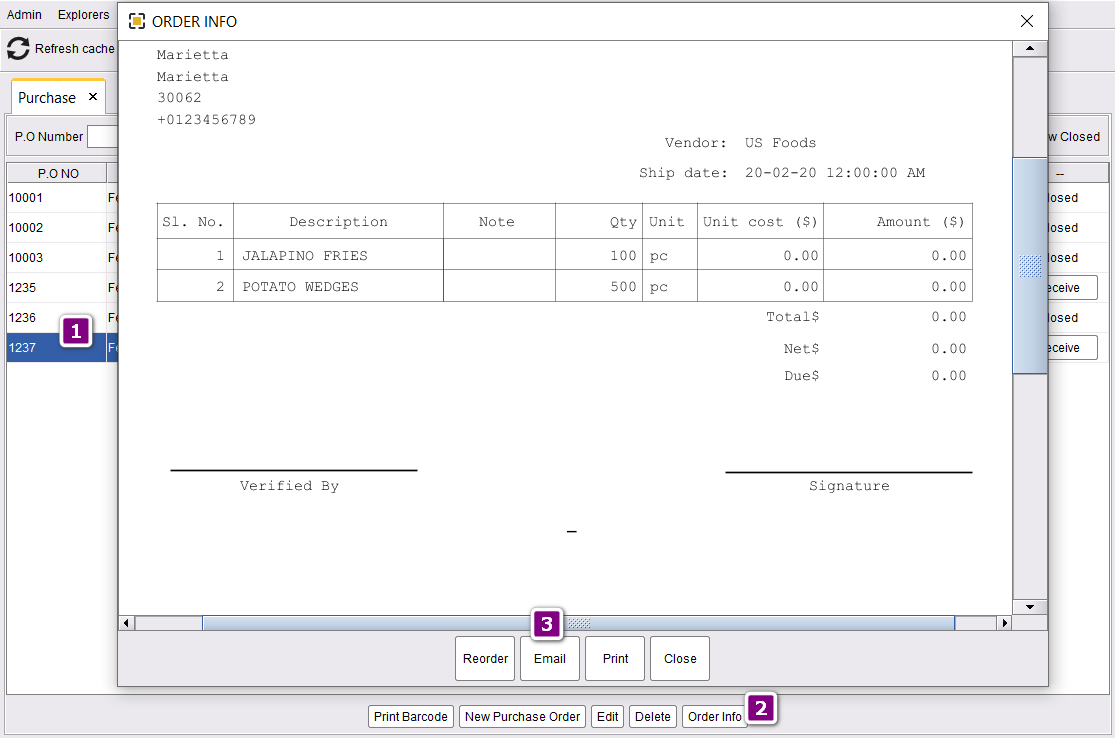
- Select the PO
- Click Order Info
- Email it to vendor
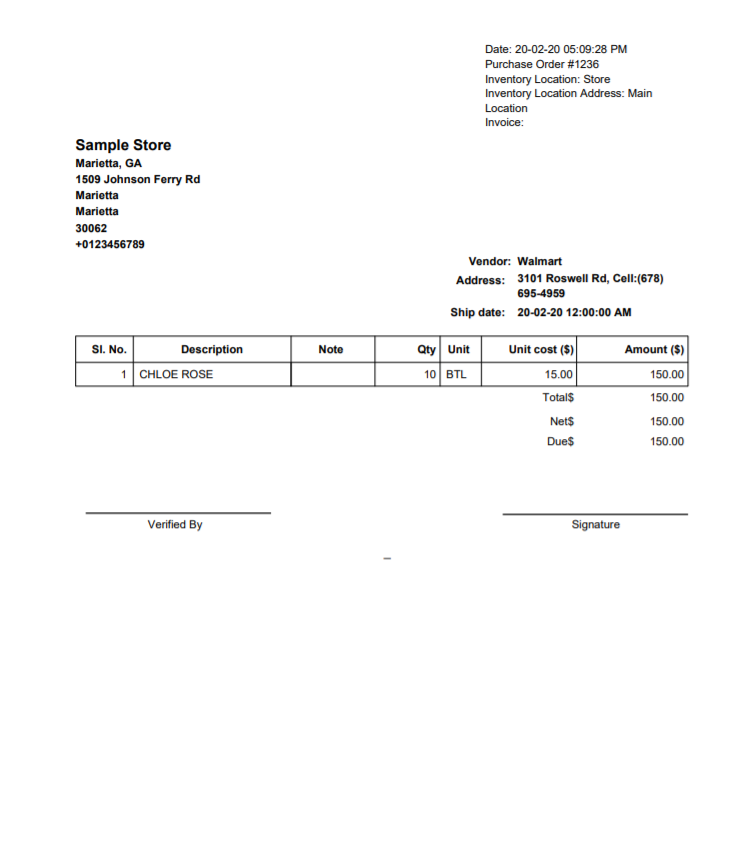
The vendor receives a formatted PO email like this:
Step 4: Receive Items (Full)
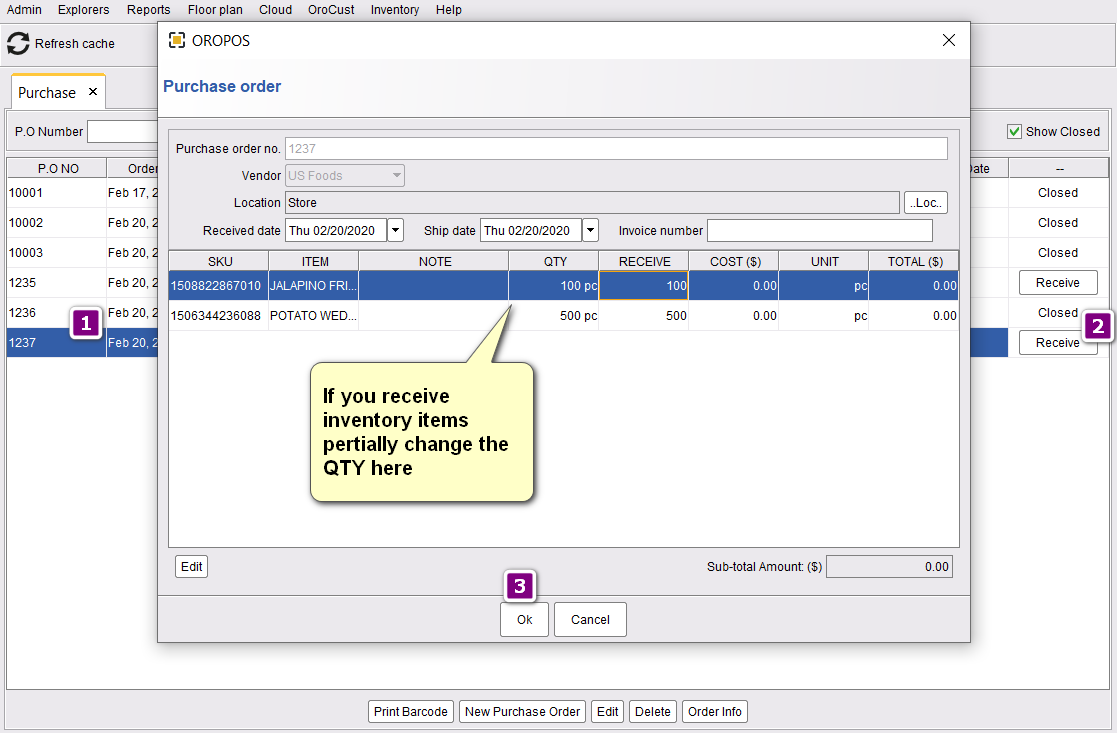
- Select the PO
- Click Receive
- If everything came as ordered, click Ok
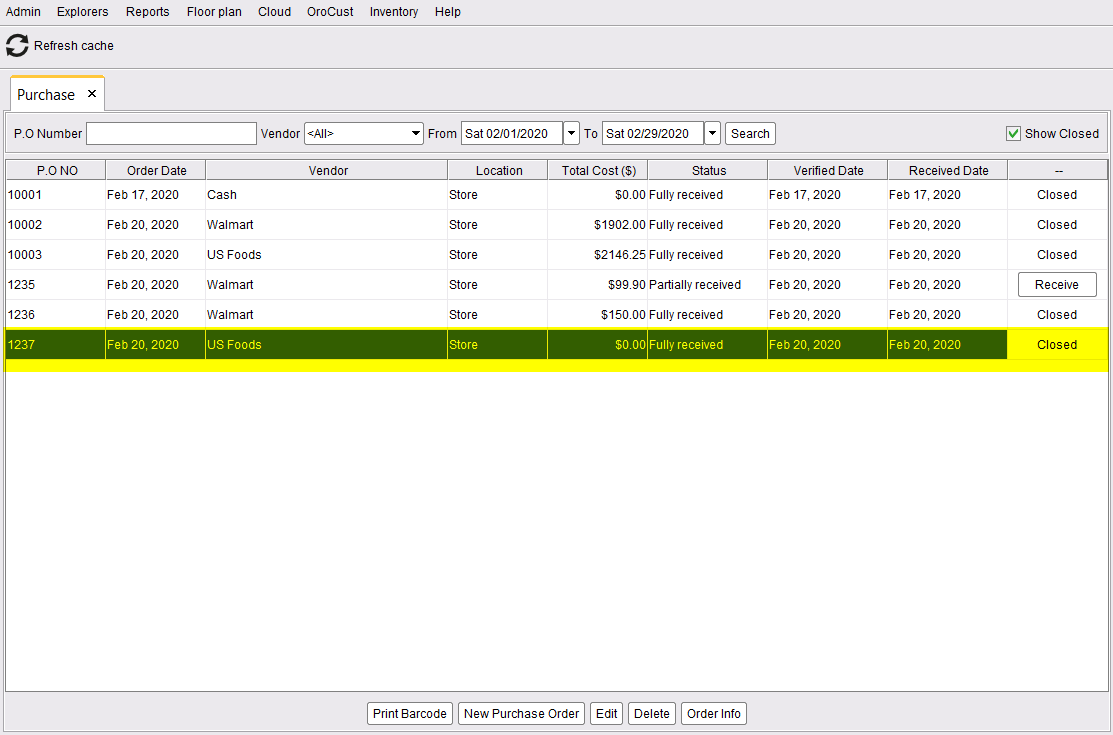
Status changes to Fully Received & Closed:
🚦 PO Status Flow
| Status | Meaning | Stock Updated? |
|---|---|---|
| 📝 Pending | Created, not yet approved | ❌ No |
| ✅ Verified | Approved by owner/manager | ❌ No |
| 📤 Sent | Emailed to vendor | ❌ No |
| 📦 Partially Received | Some items delivered, some pending | ✅ Yes (only received items) |
| ✔️ Fully Received & Closed | All items delivered | ✅ Yes (all items) |
⏳ Partial Receiving
That’s totally normal. ORO POS lets you receive what you got, and keep tracking the rest as pending.
📌 Example
You ordered 50 lb beef + 100 buns + 30 cases of soda. Truck arrives with everything except the soda (back-ordered).
- Mark Beef = Received (50 lb)
- Mark Buns = Received (100)
- Mark Soda = Pending (0 of 30)
Status: Partially Received. Stock updated for beef + buns. Soda still pending.
A partially-received PO looks like this:
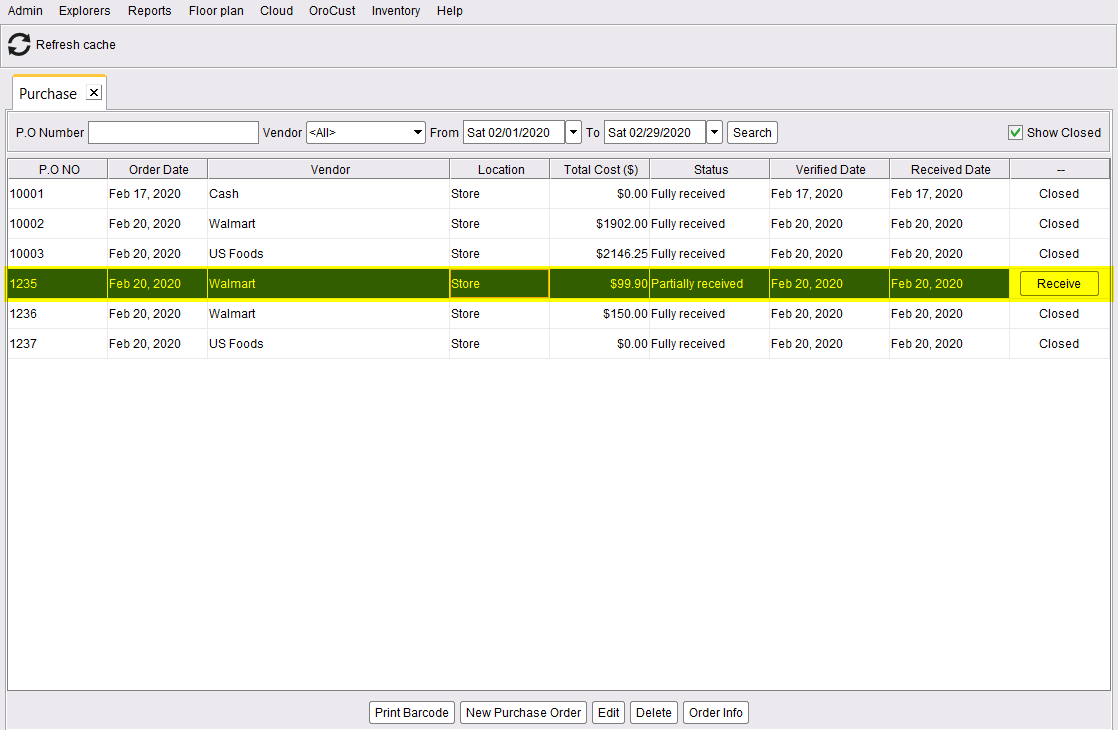
When the soda arrives later, just receive the remaining items and the PO becomes Fully Received.
💼 Real-World Examples
📌 Example 1: Small Café (Direct Purchase)
Café owner walks to local farmer’s market, buys 20 lb of fresh tomatoes for $40. Returns to shop and records:
- New PO → Vendor: Cash
- Add: 20 lb tomatoes @ $2/lb
- Click Save and Receive → Done in 30 seconds
📌 Example 2: Multi-Location Restaurant (Send PO & Receive)
Restaurant chain orders weekly from US Foods:
- Mon AM: Manager creates PO with all items needed
- Mon PM: Owner reviews and verifies
- Mon PM: Manager emails PO to US Foods
- Wed AM: Truck arrives, manager checks each item
- Wed AM: Marks fully received → PO closes automatically
📌 Example 3: Standing Weekly Order with Partial Delivery
Bar orders weekly from beer distributor. PO has 5 different products. Truck arrives but 1 brand is out-of-stock at distributor.
- Receive 4 of 5 items normally
- Mark missing item as 0 received
- PO status = Partially Received
- Distributor delivers missing brand 3 days later
- Receive remaining → PO closes
⭐ Best Practices
| Tip | Why |
|---|---|
| Use consistent PO numbering (e.g., PO-2026-001) | Easy to find and reference |
| Always verify before sending | Catches over-ordering or wrong vendor |
| Receive items same day as delivery | Stock stays accurate, prevents confusion |
| Match received quantities against the invoice | Catches shortages or vendor errors |
| Use “Cash” vendor for one-off purchases | Avoids cluttering vendor list |
📚 Related Guides
| → Stock In / Out | → Adding Vendors | → Inventory Setup |
📞 Need More Help?
Visit our knowledge base at guide.orocube.com or contact support at helpdesk@orocube.net