

In ORO POS terminals can add receipt printers to print sales receipts. If multiple receipt printers are added they will print the same copy to all of them. There are also options to turn off those receipt printers.
We recommend our certified receipt printer models listed on our website.
Supported paper sizes
The recommended paper size is 80mm. But stores can choose from one of the following sizes
- 80mm.
- 76mm.
- 58mm.
Printer modes
Our certified printers can print in one of the following modes. ESC/POS modes will print faster but may need some extra settings.
| # | Standard Mode | ESC/POS Mode |
| Feature | Use graphics layout | Use text layout |
| Speed | Regular | Fast |
| HTML support | HTML 3 | None |
| Drawer connectivity | Requires drawer trigger | Drawer trigger or RJ12 |
Configure Receipt printer in Standard Mode
To add a receipt printer please follow the steps below,
Back office–> Admin–> Terminal configuration–> Print–> Add a receipt printer
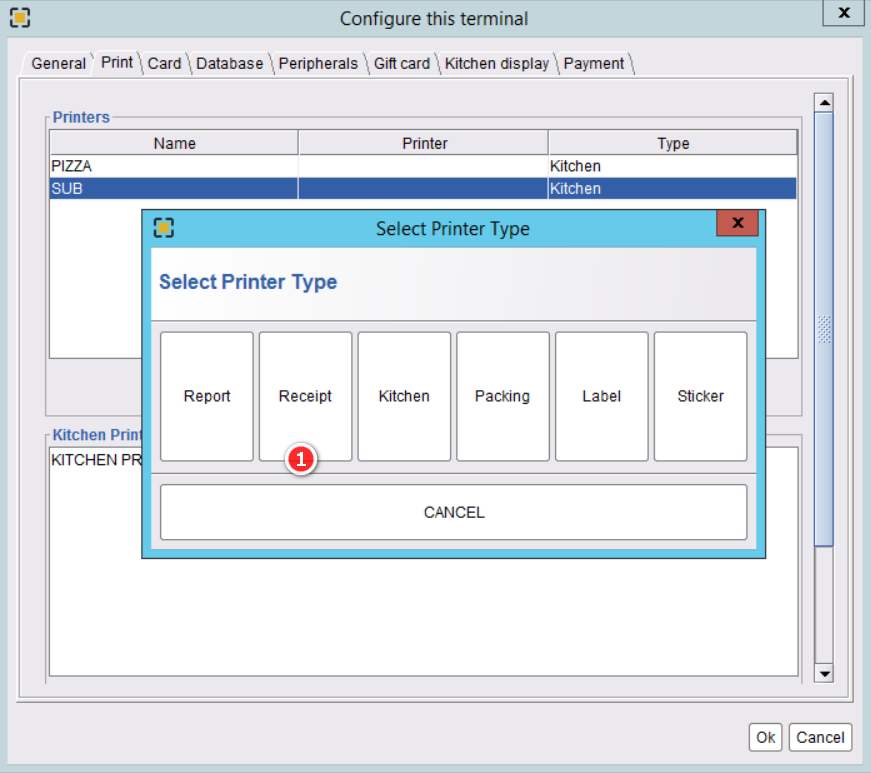

- Click on the Print tab.
- Click on Add to select a printer type.
- Name your receipt printer.
- Select the Standard mode.
- Select your device. (Please install the device driver prior to finding the device here)
- Press Ok to save it.
After setting up the receipt printer, please restart the system, take orders, and check the printer performance.
Configure Receipt printer in ESC/POS Mode
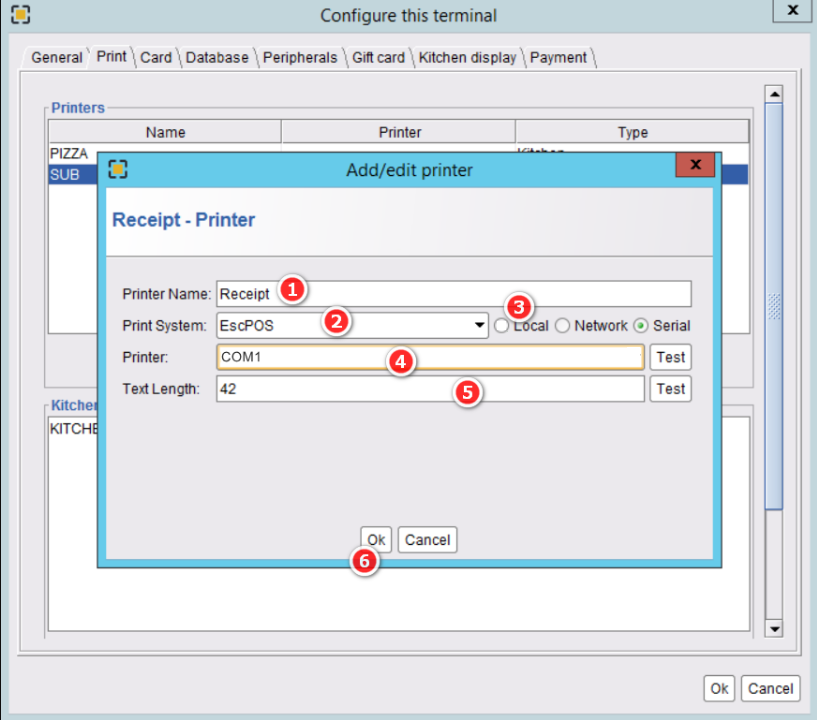
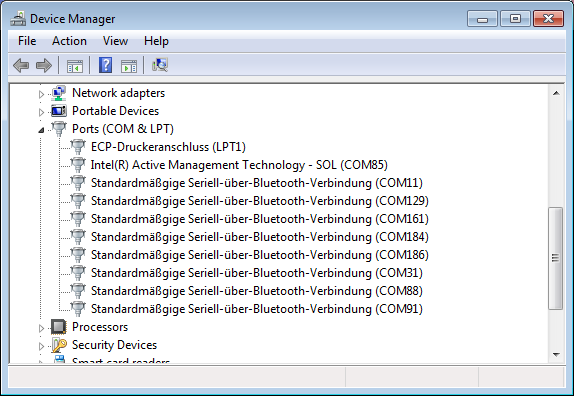
Configure printer like the previous step but in Printer mode select “EscPOS. You need to find the Printer port in step 4. In Windows this is found in Control Panel -> Device Manager -> Ports
You can adjust text length from 32 to 48 as per paper size.