

🚀 ORO POS Installation & Setup Guide
Step 1: Download ORO POS
New User? Go to forms.orocube.com/download for your free trial
Existing Customer? Go to shop.orocube.com to purchase or download
For Offline Terminals (No Internet Connection)
Download the “ORO POS bundled with Java JRE” package. This includes everything needed—no additional software installation required.
Step 2A: Installation (ONLINE Setup)
Follow these steps if your terminal has an internet connection.
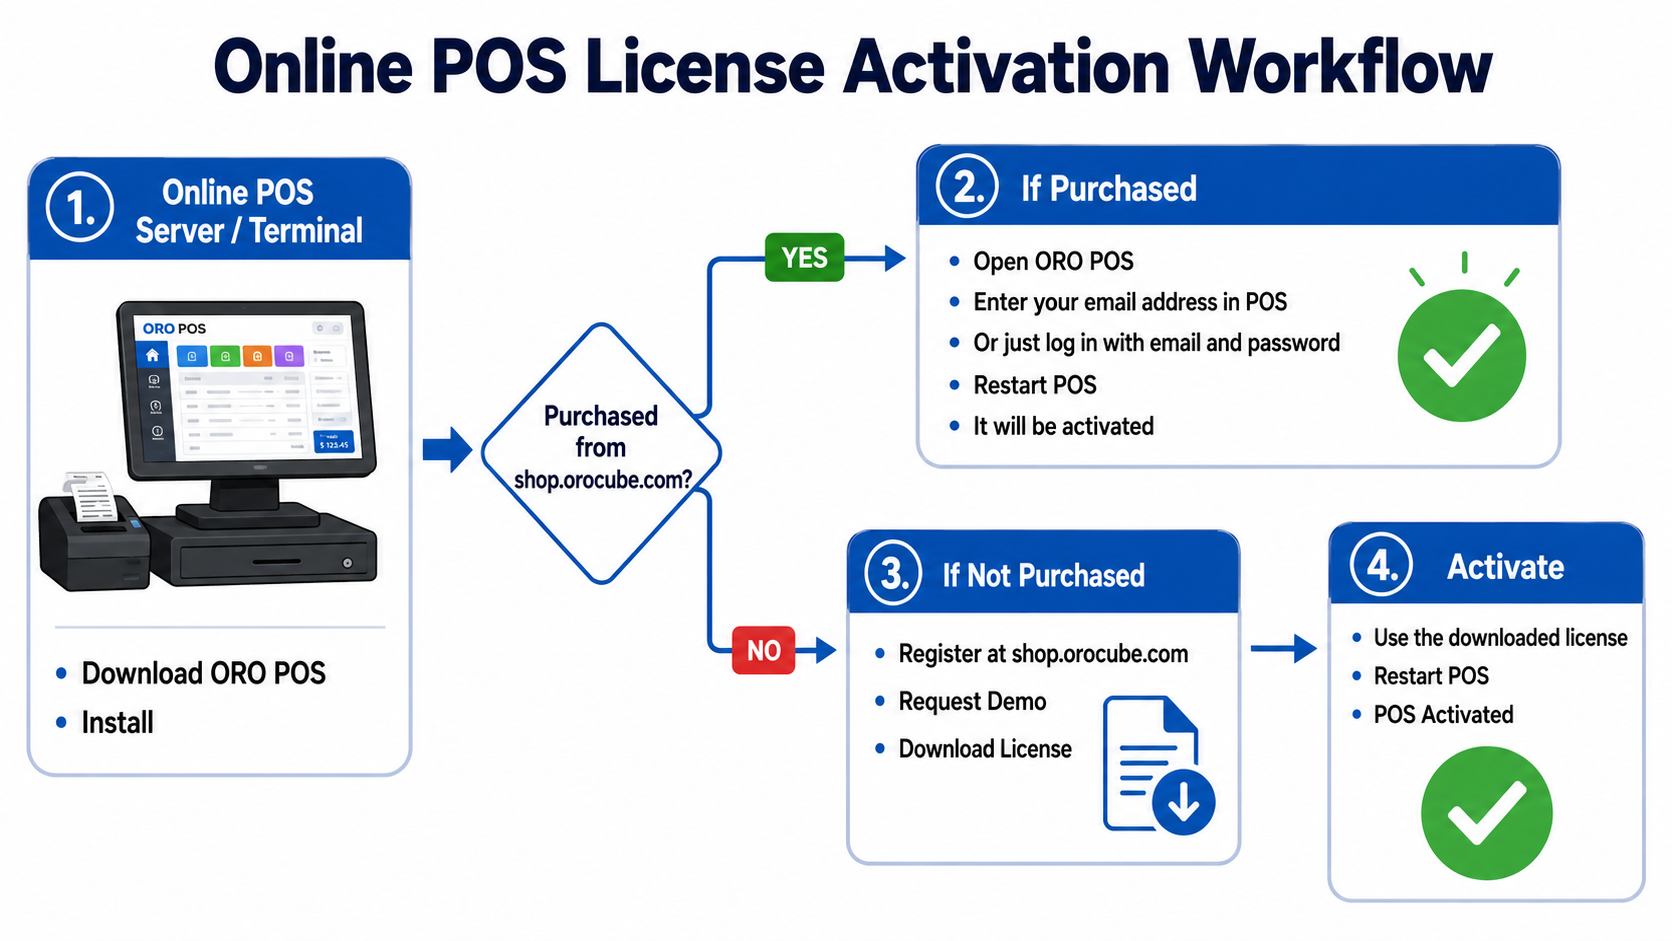
📊 Online activation workflow at a glance
Windows (Online)
Mac or Linux (Online)
java -jar oropos.jarYour system is now licensed and ready. Proceed to Step 4: Initial Setup.
Step 3A: Activate License (ONLINE)
If you have an internet connection, this is the fastest way to activate.
Your system is now licensed and ready. Proceed to Step 4: Initial Setup.
Step 2B: Installation (OFFLINE Setup)
Follow these steps if your terminal has NO internet connection.

📊 Offline activation workflow at a glance
Windows (Offline)
Mac or Linux (Offline)
java -jar oropos.jarStep 3B: Activate License (OFFLINE)
Use this process if your terminal has NO internet connection.
This process requires both:
• Your offline terminal (ORO POS)
• A computer with internet access
Stage 1: Get Your Terminal Key
Stage 2: Download License File
Stage 3: Import License
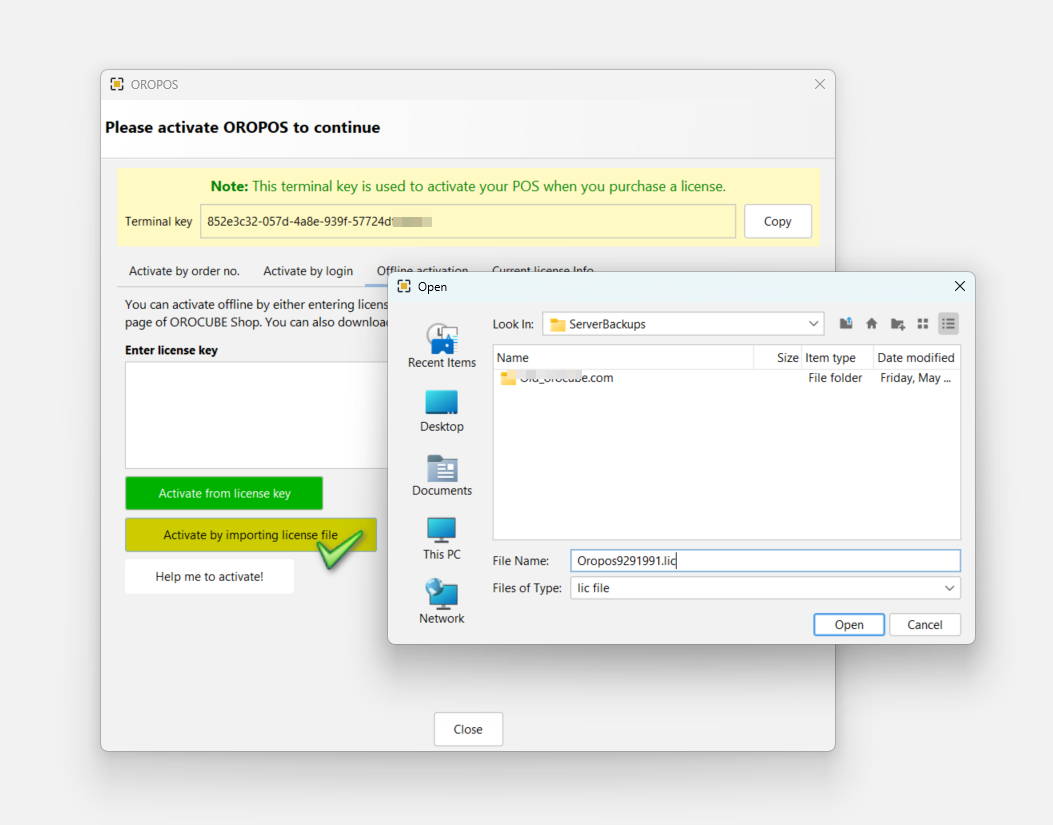
📸 Click “Activate by importing license file” and select the downloaded .lic file
Your system is now licensed and ready. Proceed to Step 4: Initial Setup.
Step 4: Initial Setup
This is the same for both online and offline installations.
ORO POS is now installed and ready to use.
Never open more than one instance of ORO POS at the same time. Running multiple copies simultaneously can cause data corruption.
🖥️ Single Terminal vs Multiple Terminals?
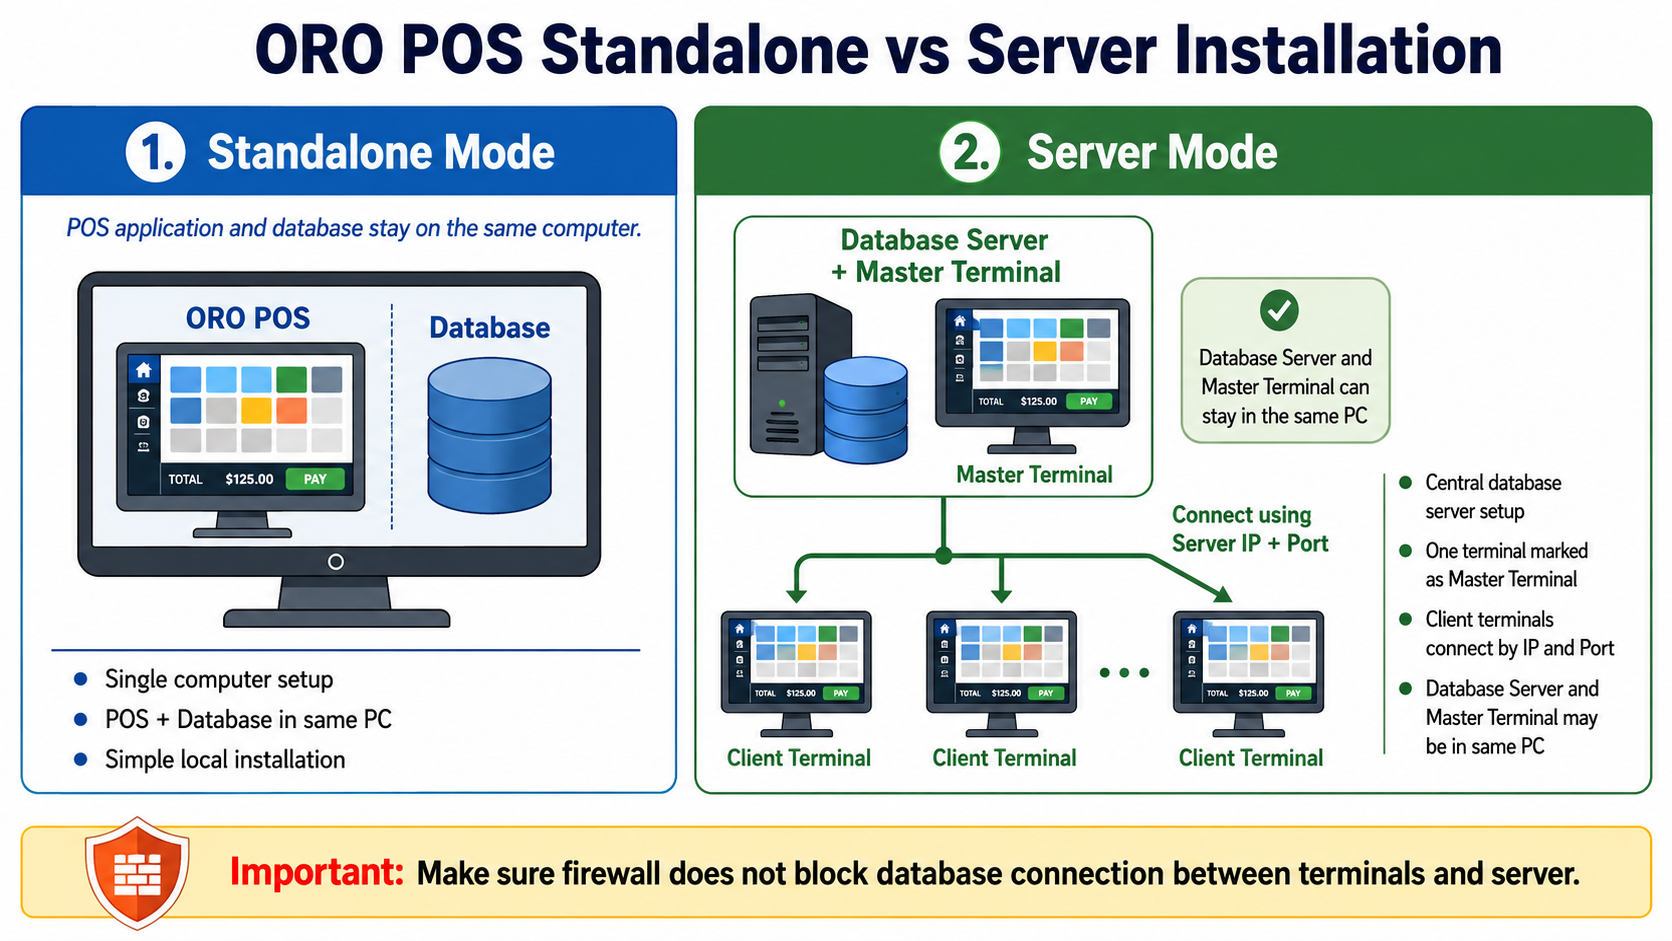
For demos or small stores, Standalone mode (single terminal) is the easiest way to get started. But many real-world stores need multiple terminals running together.
ORO POS includes a built-in wizard for setting up multiple terminals — no advanced IT skills needed.
Before version 1.6.8: Apache Derby was used as the database.
1.6.8 and later: ORO POS now installs PostgreSQL by default — much more stable, and can handle a huge number of terminals.
What’s Next?
- Run the Setup Wizard to configure your store settings
- Review the Menu Programming Guides to set up your products
- Configure pricing, discounts, and payment methods
- Set up user accounts and permissions
Visit our knowledge base at guide.orocube.com or contact support at helpdesk@orocube.net