

🎨 Menu Page Designer — How It Works
Think of Menu Pages as blank grids of buttons where you decide which items to show, and where. They’re the easiest way to organize your menu for fast ordering.
In ORO POS, your Item List (master catalog) is separate from your Menu Pages (what cashiers actually see).
- 📦 Item List = your warehouse — every product you sell
- 🎨 Menu Pages = your storefront — only what you want to show
This lets you have thousands of items but show just the right ones on each page.
📹 Watch the video tutorial
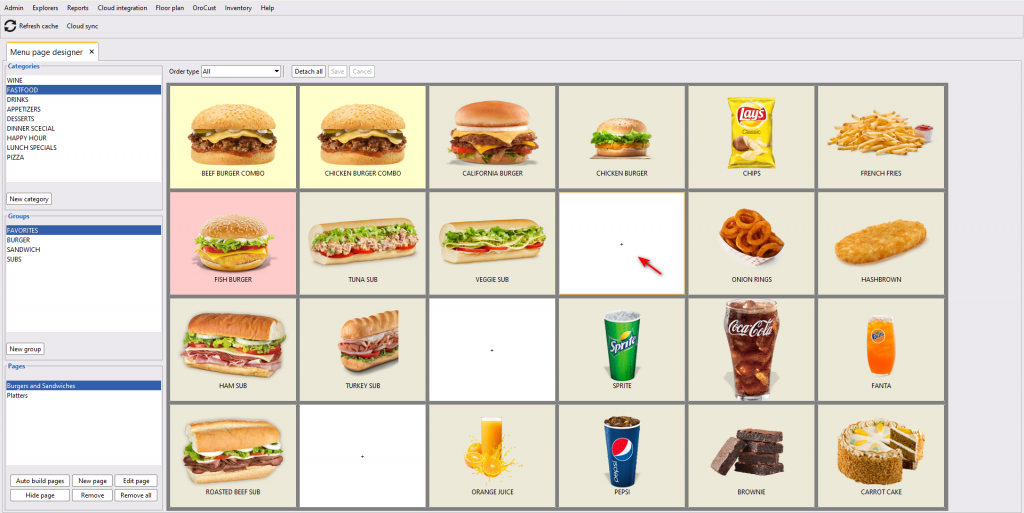
🟦 Visualize: Menu Pages = A Grid of Buttons
A Menu Page is literally just a grid of empty button slots. You drag items onto the slots, and that’s what cashiers see when ordering.
Empty Menu Page (4×6 grid)
| + Add | + Add | + Add | + Add |
| + Add | + Add | + Add | + Add |
| + Add | + Add | + Add | + Add |
| + Add | + Add | + Add | + Add |
| + Add | + Add | + Add | + Add |
| + Add | + Add | + Add | + Add |
Menu Page after attaching items (some slots still empty)
| Burger $8.99 |
Pizza $12.99 |
+ Add | Fries $3.99 |
| Coke $2.49 |
+ Add | Tacos $6.99 |
Salad $7.99 |
| Wings $9.99 |
Hot Dog $5.49 |
+ Add | + Add |
| Sandwich $7.49 |
Pasta $11.99 |
Coffee $2.99 |
+ Add |
| Beer $5.49 |
+ Add | Wine $7.99 |
Sushi $14.99 |
| + Add | + Add | + Add | + Add |
🔄 One Item Can Live on Many Pages
The same item can be attached to multiple menu pages. You don’t have to duplicate items.
You sell “Coke”. It can appear on:
- ⭐ Favorites page (top sellers)
- 🥤 Beverages page
- 🍔 Combo Meals page (as a side option)
It’s still one item in your inventory — but customers can find it from different starting points.
🥤 One “Coke” item attached to 3 pages
|
⭐ Favorites
🥤 Coke
|
🥤 Beverages
🥤 Coke
|
🍔 Combos
🥤 Coke
|
Same Coke. Same inventory. Same price. Three different pages.
⚡ Fast Loading: Items Load As Needed
Menu pages only load items as cashiers tap into them — not all at once. This means:
- ✓ POS opens fast even with thousands of items
- ✓ Touchscreen feels snappy
- ✓ No long startup wait
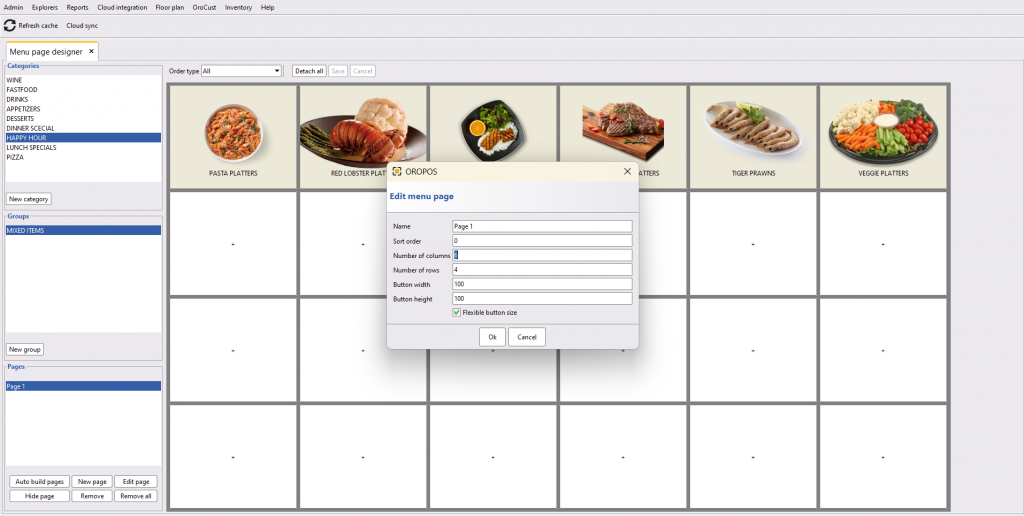
🎨 Step 1: Create a Menu Page
- Go to Back-Office → Explorers → Menu Page Designer
- Select a Category and Group from the left
- Choose your grid size (rows × columns)
- Click the “+” on any empty button to attach an item
Turn on Flexible button size and the system auto-resizes buttons to fill the full page — perfect when you have a few items and want them big.
🖱️ Step 2: Organize Items (Drag & Drop)
Once items are attached, just drag and drop to rearrange them however you like.
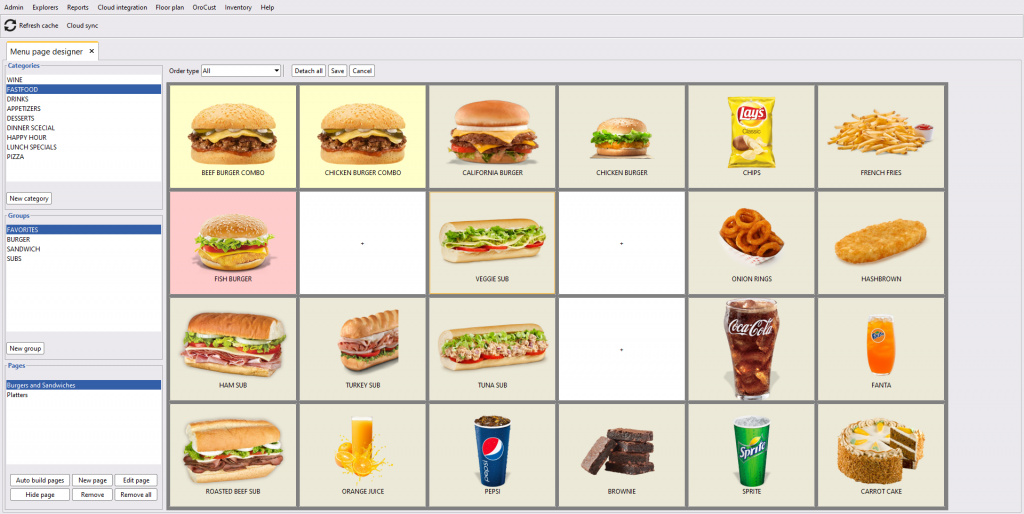
- 🔝 Put fast-selling items in the top-left corner
- 🎨 Group similar items by color (use button colors)
- 📦 Keep under 16 items per page for fast scanning
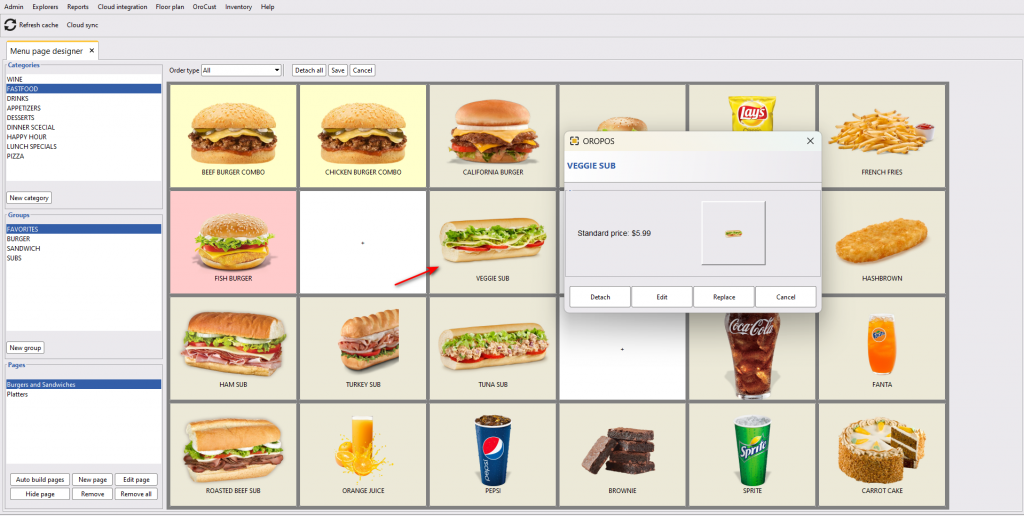
✏️ Edit, Detach, or Replace Items
Click any item button to see options like Detach, Edit, or Replace.
| Option | What It Does |
|---|---|
| Detach | Removes item from THIS page only — item still exists in your catalog and on other pages |
| Edit | Edit the actual item (name, price, picture, etc.) |
| Replace | Swap this button for a different item |
🗑️ Remove or Edit a Menu Page
Click “Remove” or “Edit page” from the page-level menu.

🎫 Different Pages for Different Order Types
You can set different menu pages for different Order Types:
- 🍴 Dine In menu page — full menu
- 📞 Take Out menu page — takeout-friendly items only
- 🚗 Delivery menu page — delivery-friendly items only
- 🚚 Food Truck menu page — limited truck menu
Cashiers see only what’s relevant for the order type they’re handling.
🧩 Modifier Pages (Add-ons & Customizations)
After creating modifier groups (like “Toppings”, “Sides”, “Drinks”), you can design a modifier page for each menu item — same drag & drop concept.
Path: Back Office → Explorers → Menus and Others → Select Menu Item → Edit → Modifier Group → Create New
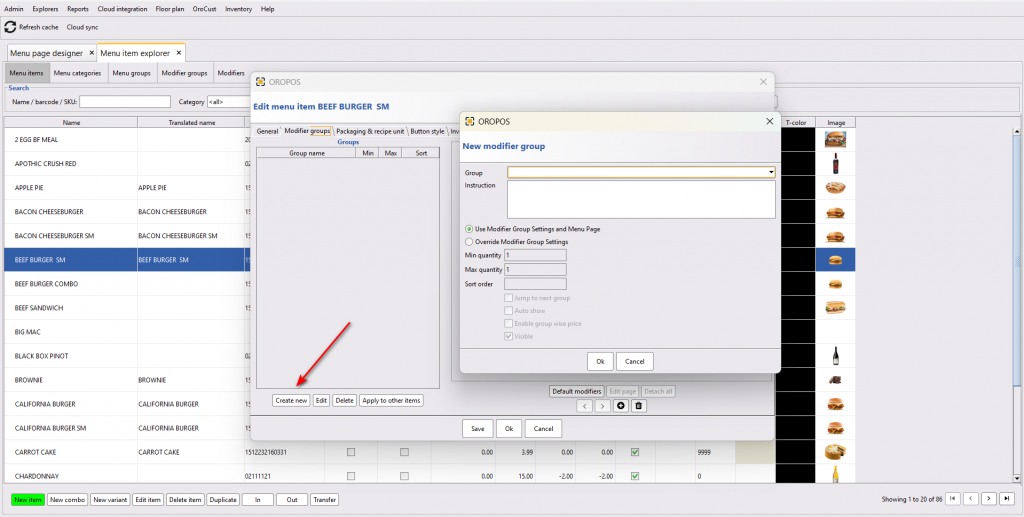
Modifier Group Settings
| Setting | What It Does |
|---|---|
| Minimum quantity | Customer must pick at least this many. Example: min 1 = must pick at least 1 sauce |
| Maximum quantity | Customer cannot pick more than this many. Example: max 2 toppings |
| Jump to next group | Auto-jump to next group after customer picks max items — speeds up ordering |
| Auto show | Modifiers pop up automatically when item is selected |
| Enable Groupwise price | Set group-level pricing rules on top of per-modifier prices |
| Visible | Show or hide the modifier group |
| Save and auto build page | Auto-creates the modifier page for you — saves time! |
The “Apply to other items” feature lets you copy the same modifier page to similar items. Set up modifiers once → apply to all burgers, all pizzas, etc.
🆕 Updates in ORO POS v1.5
The screenshots above show ORO POS 1.4. Below are improvements in 1.5:
Smaller Grid Sizes
Menu page designer now supports rows and columns smaller than 4 — useful for stores with limited menus.
Combo Item Option Restored
The “Enable combo item” option is back in the menu item edit form.
Once an item is marked as a combo, it cannot be reverted to a regular item. Plan your combo setup carefully.

📞 Need More Help?
Visit our knowledge base at guide.orocube.com or contact support at helpdesk@orocube.net