
This document will guide you to build your POS system from scratch. We will remove the database and let the system create everything through the setup wizard.
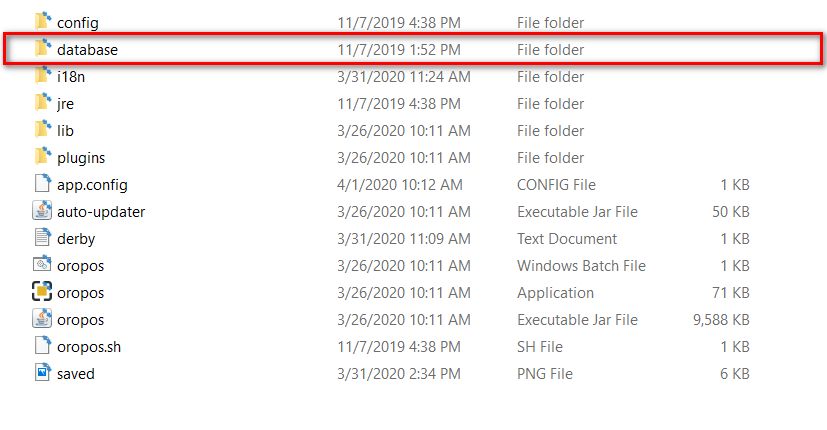
Delete Database
- If you are using Derby Single, shutdown ORO POS and delete the database folder from the ORO POS root folder.
- If you are using Derby Server, MySQL, PostgreSQL or SQL server you need to delete the respective database.
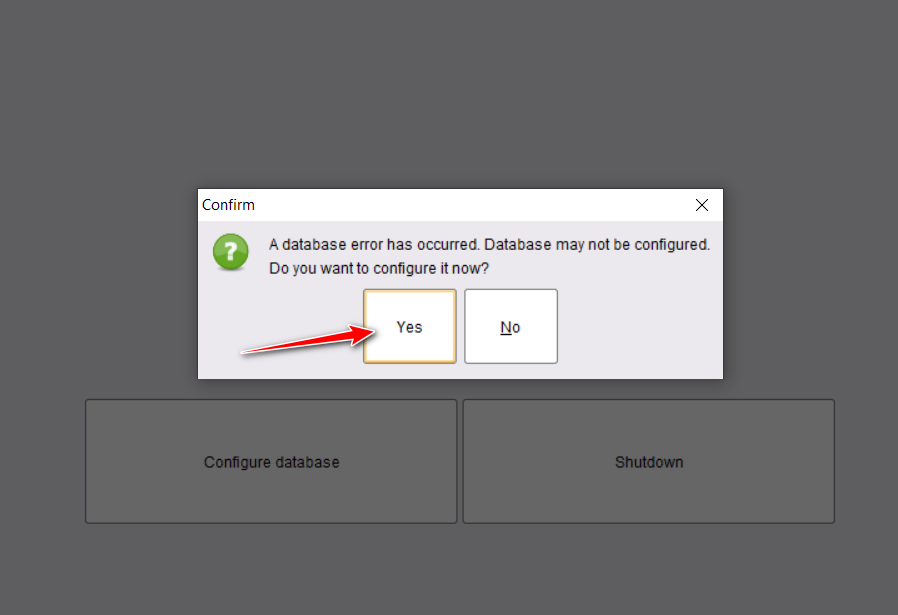
Start ORO POS
Start the POS by double-clicking on the ORO POS Application

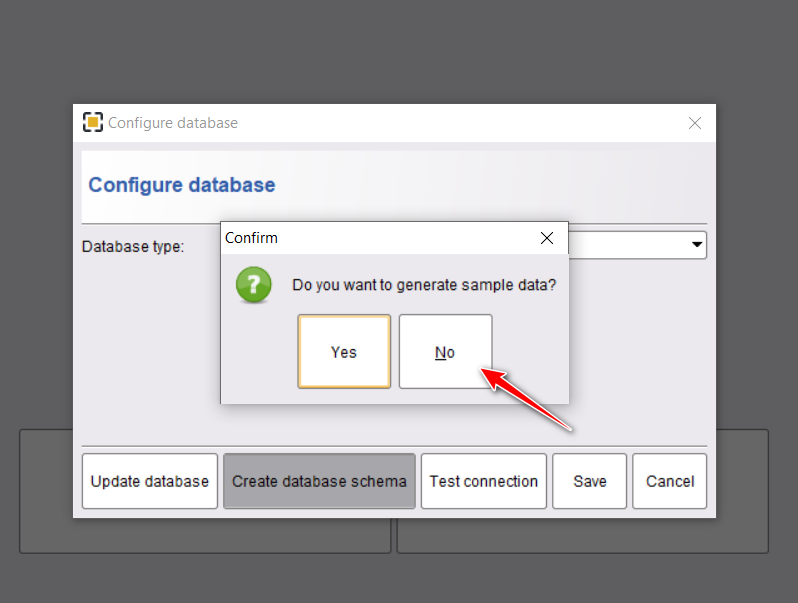
Configure Database
Configure the database. For a fresh new store configure the database with no Sample DATA.
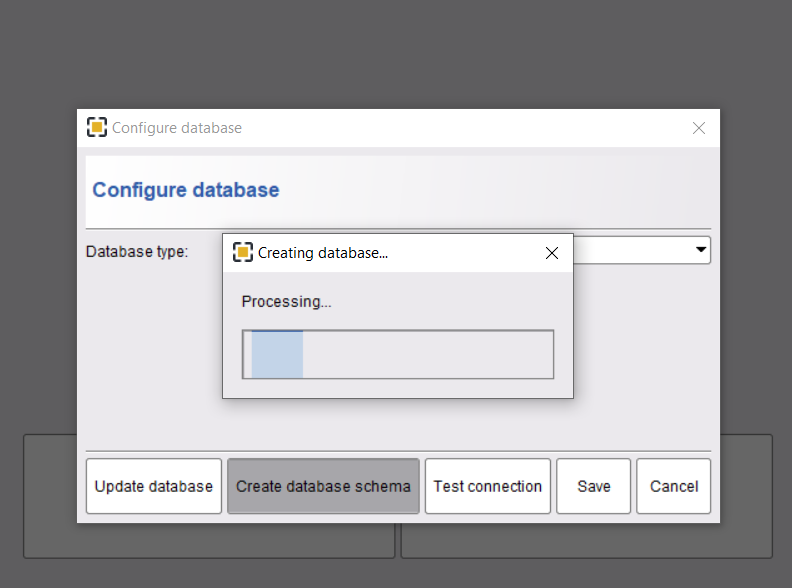
This will take a while,
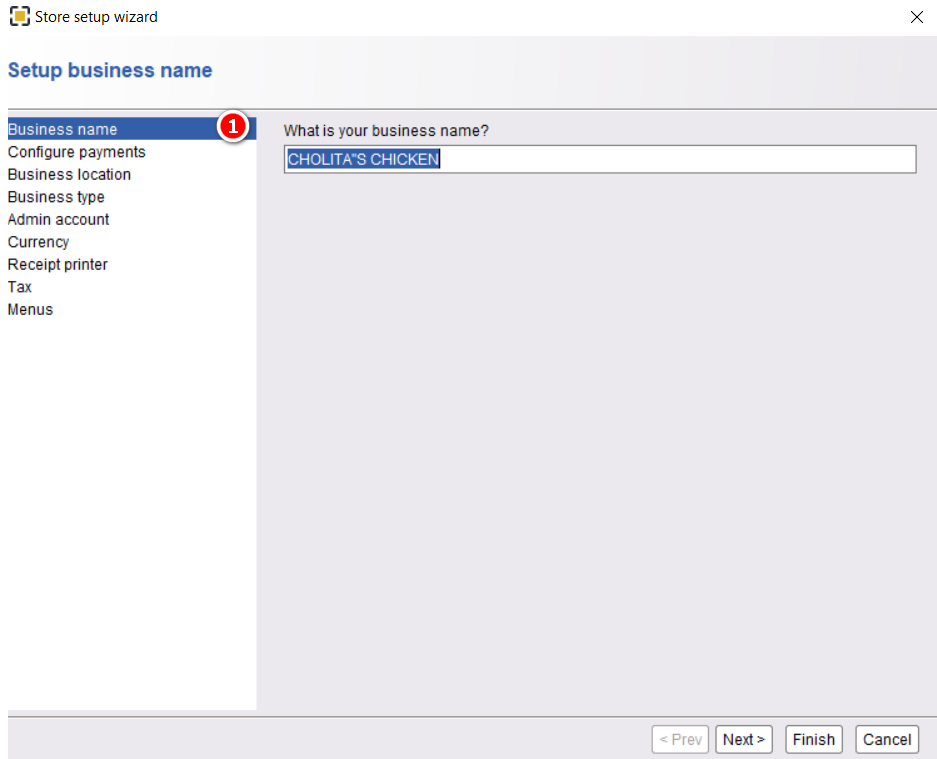
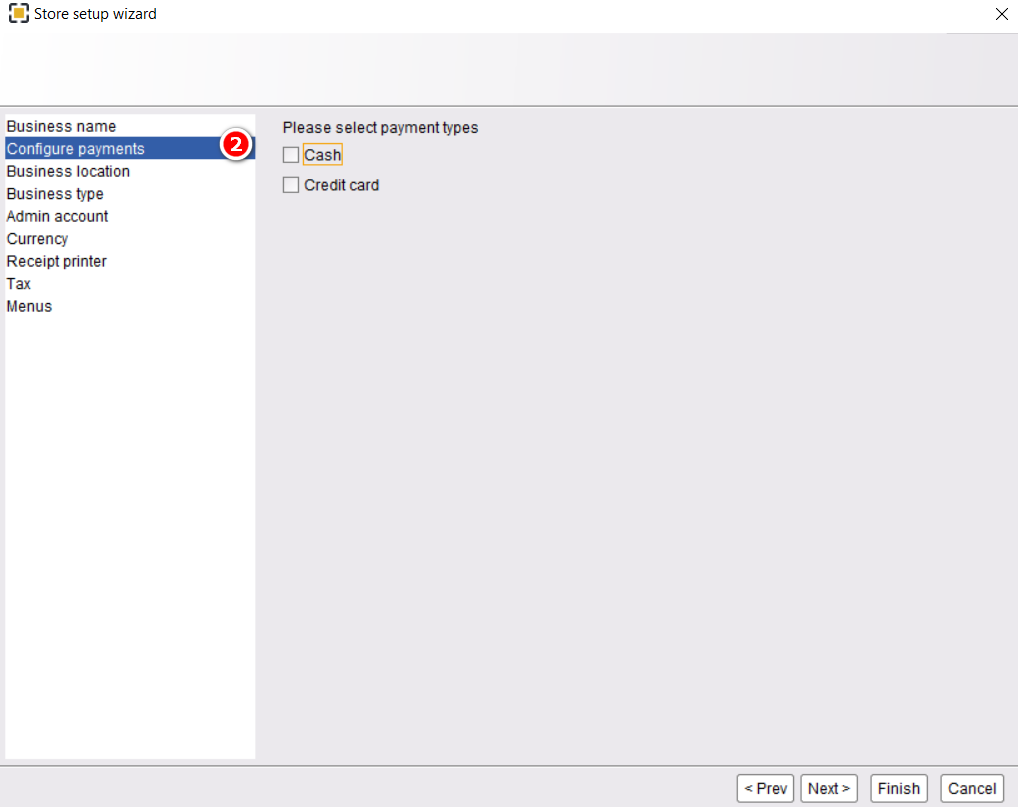
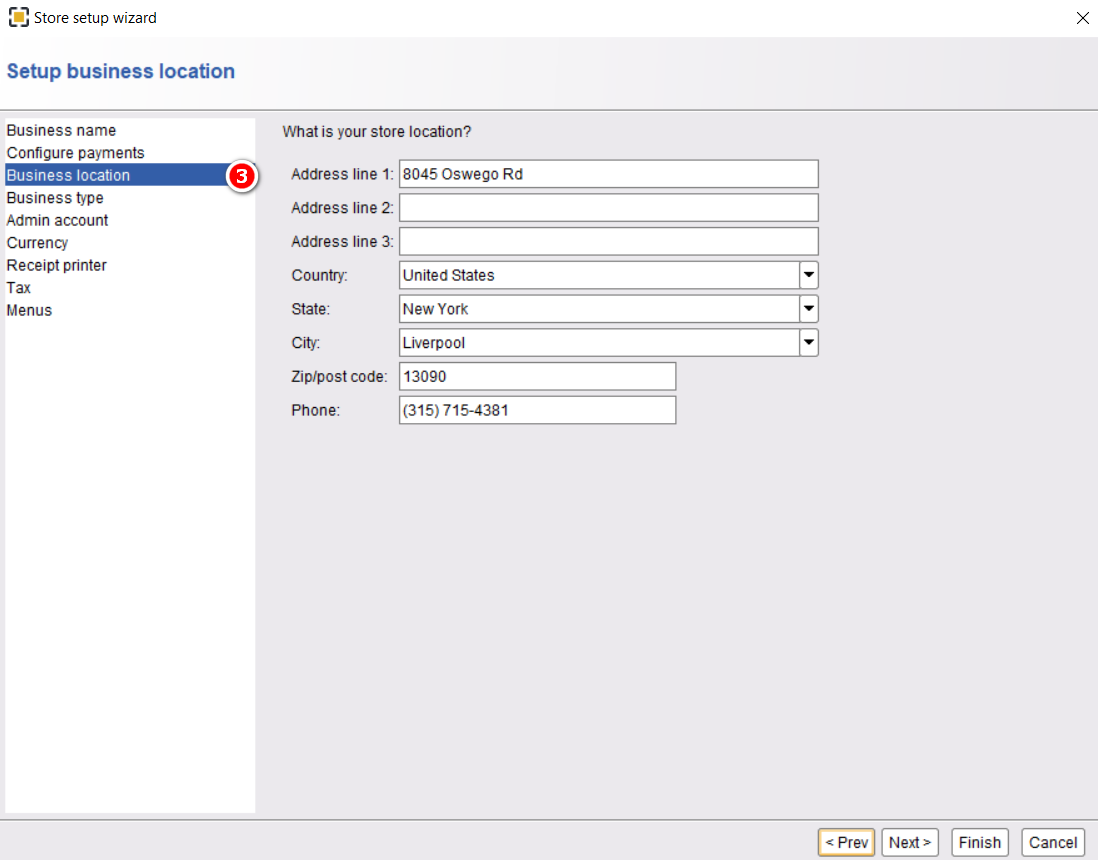
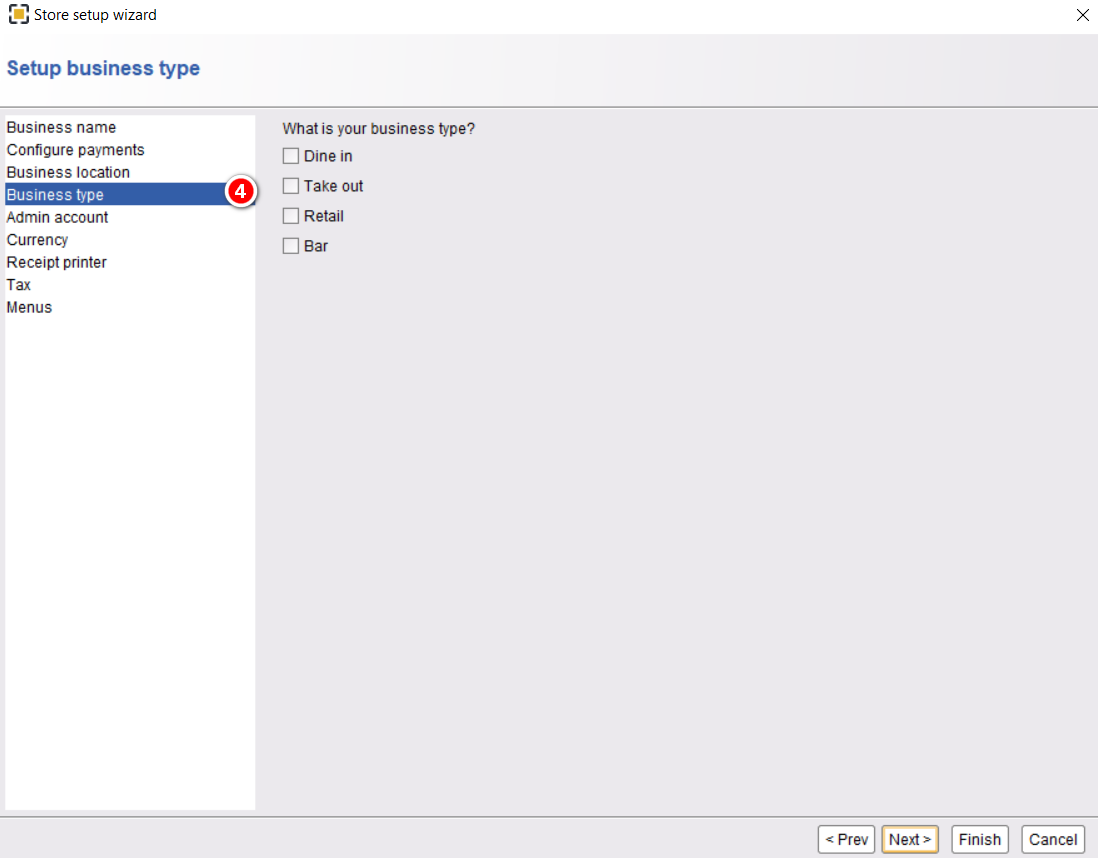
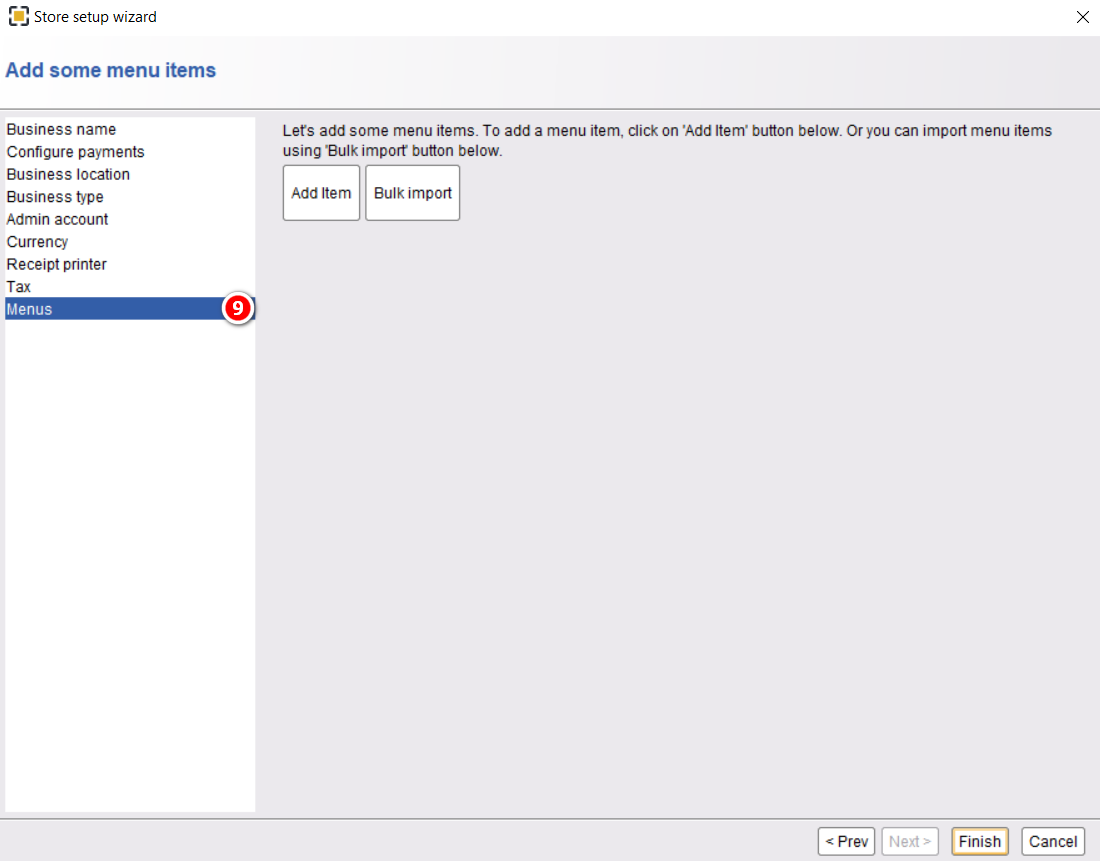
Follow the Setup wizard
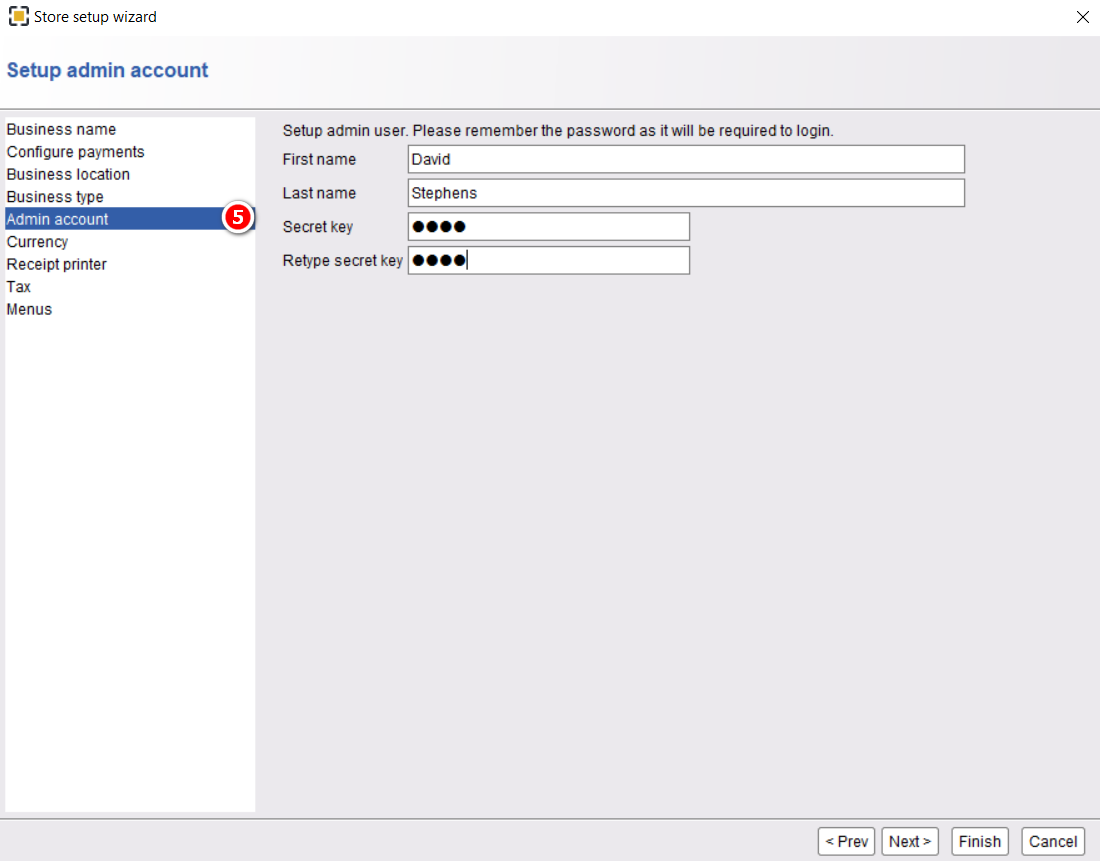
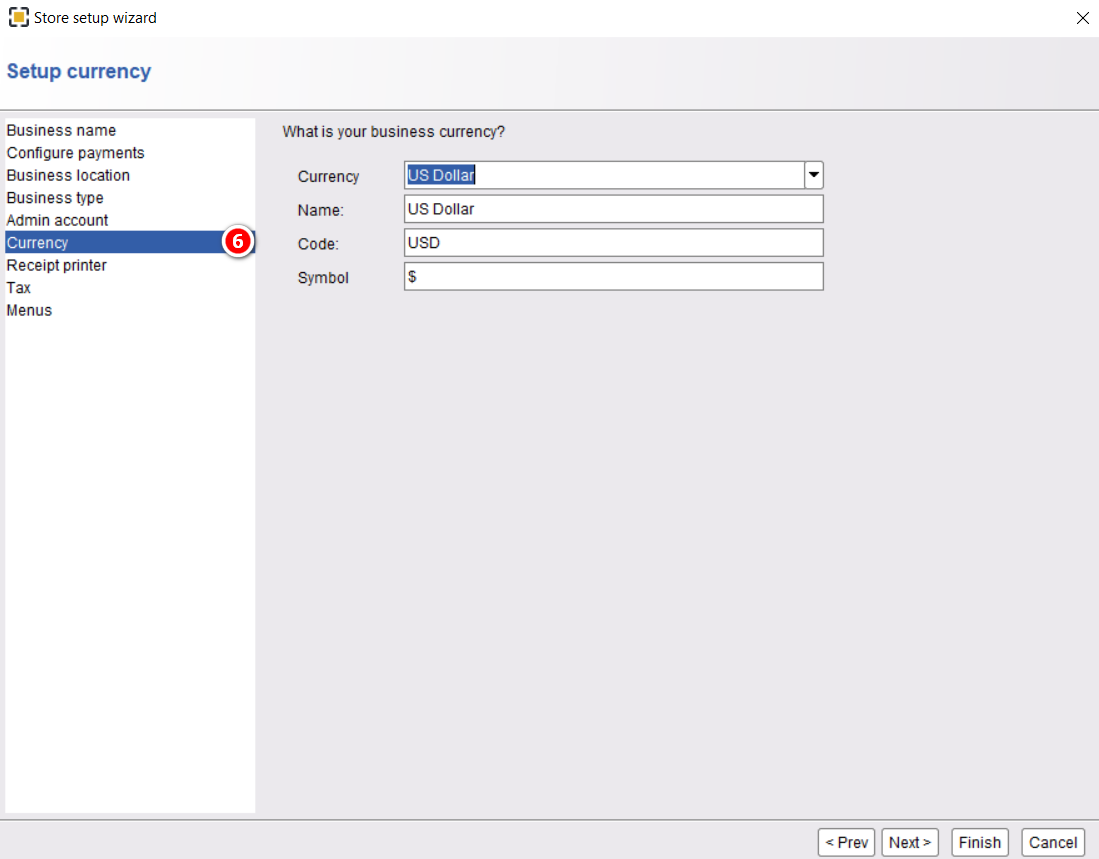
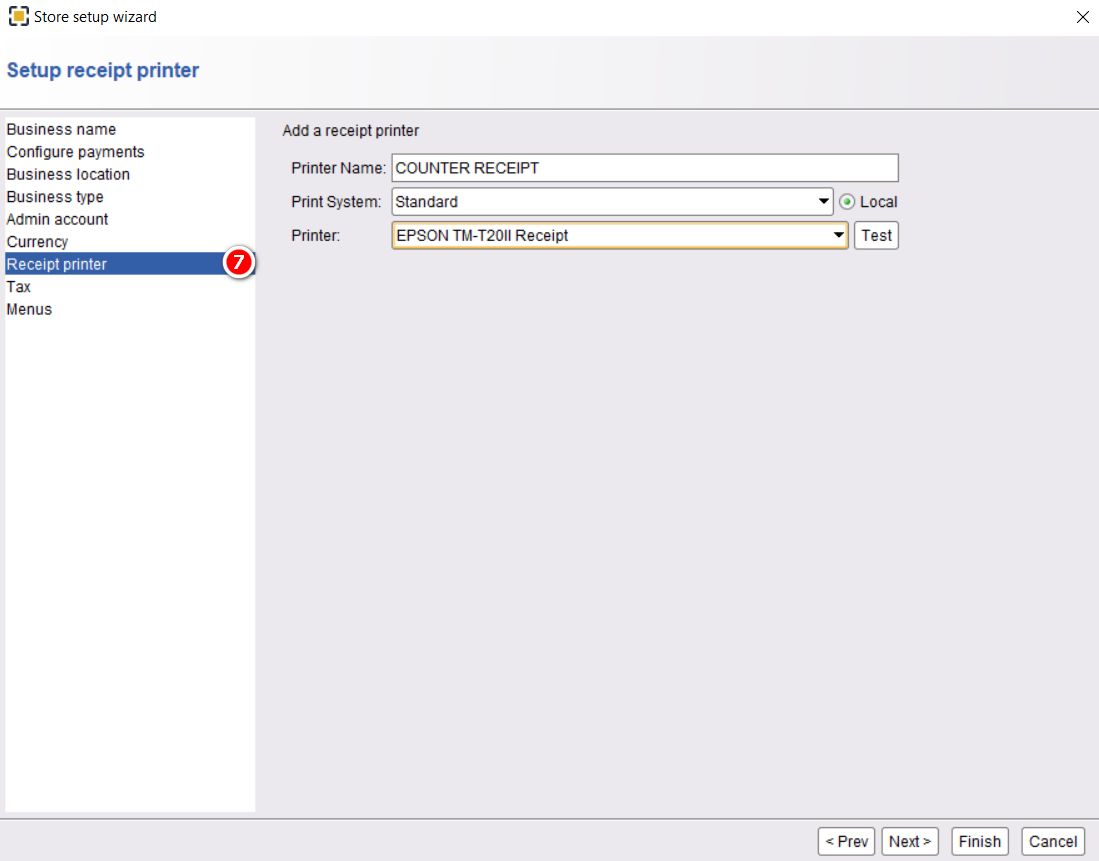
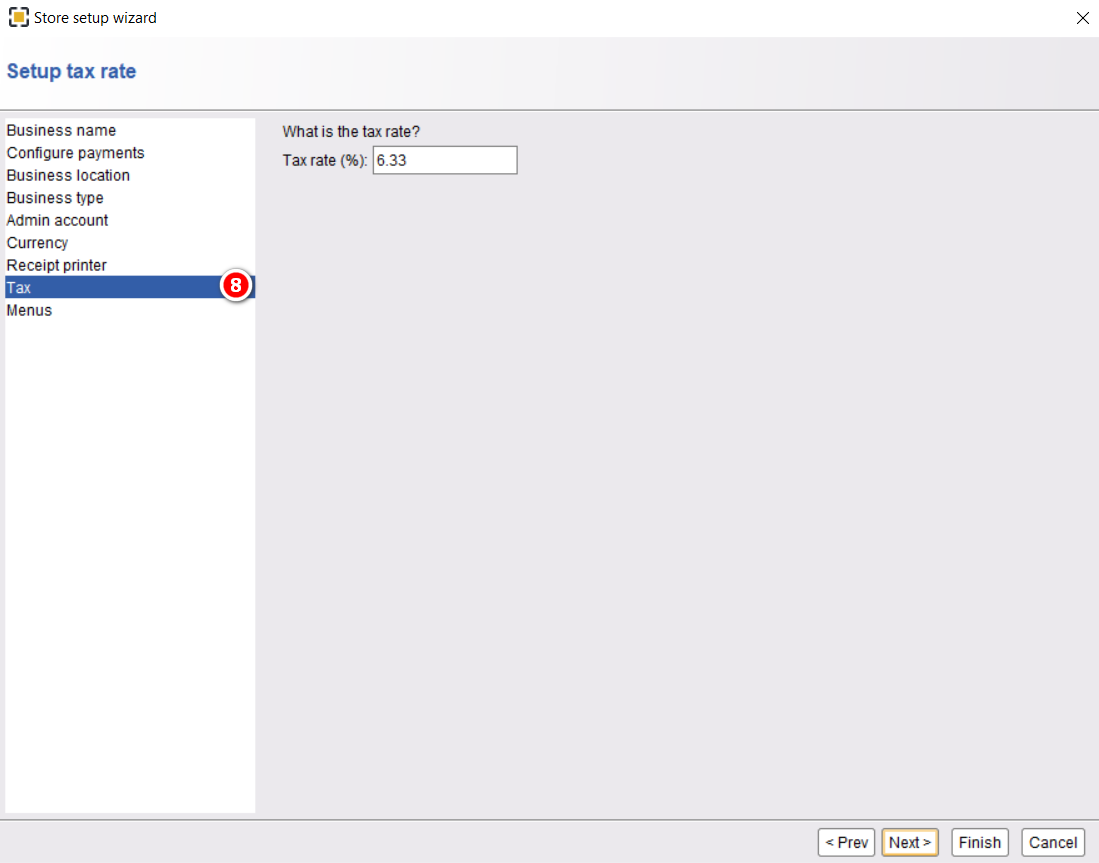
In this section enter all your store information, select payment type, order type, tax, etc. Once you are done with one wizard, go to the next wizard by clicking on Next from the bottom. In the final and last stage, you can add menus one by one or if you can bulk import your menu items from a spreadsheet. Click on Finish when you are done.

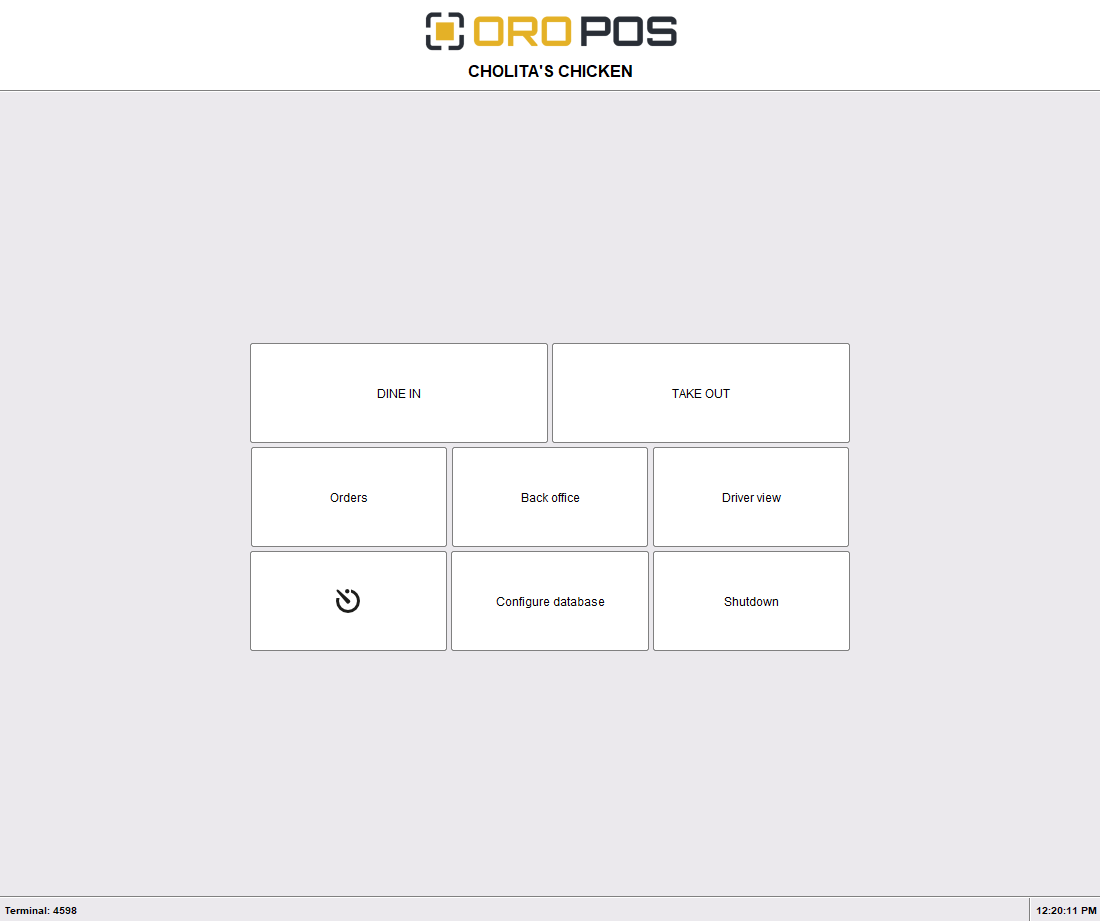
Restart The POS
Once you are done setup the wizard, the POS will restart by itself and look like the following,
This setup wizard is for small businesses having single terminal. If you have a multi terminal environment, setup your database first, then follow the same setup wizard procedure.