

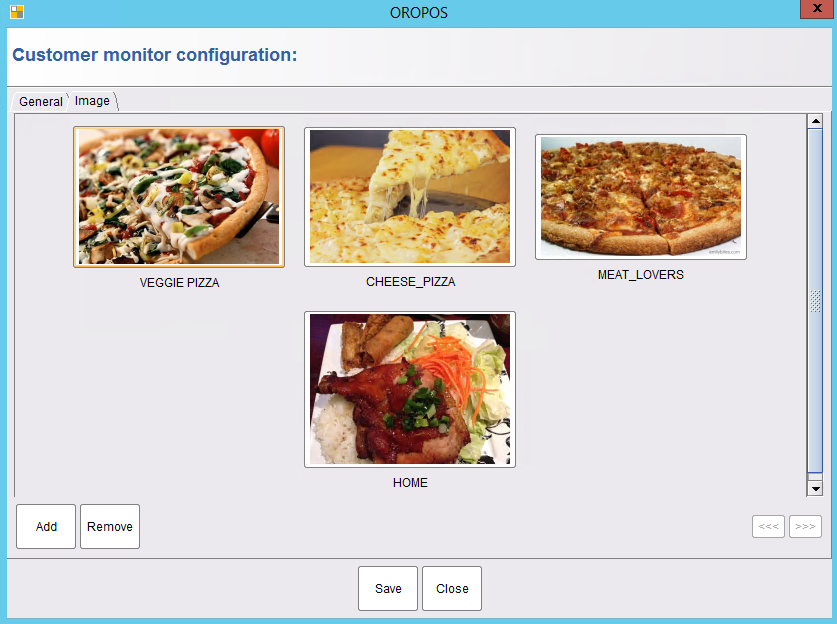
To Configure Customer monitor, Go to back office–>admin–>customer monitor configuration. Select one of the options.

Attach images if you want to show images like a slideshow.
Then, from any order types like “Take Out”, “Dine-In”, “Retail” etc. you can turn on your customer display by clicking on the following buttons,


Then, drag and drop your customer monitor to the 2nd display of your POS machine.
Finally, it will start showing all menu items chosen for orders in the customer monitor.
