
To add a new floor visit back-office–> floorplan –> floors
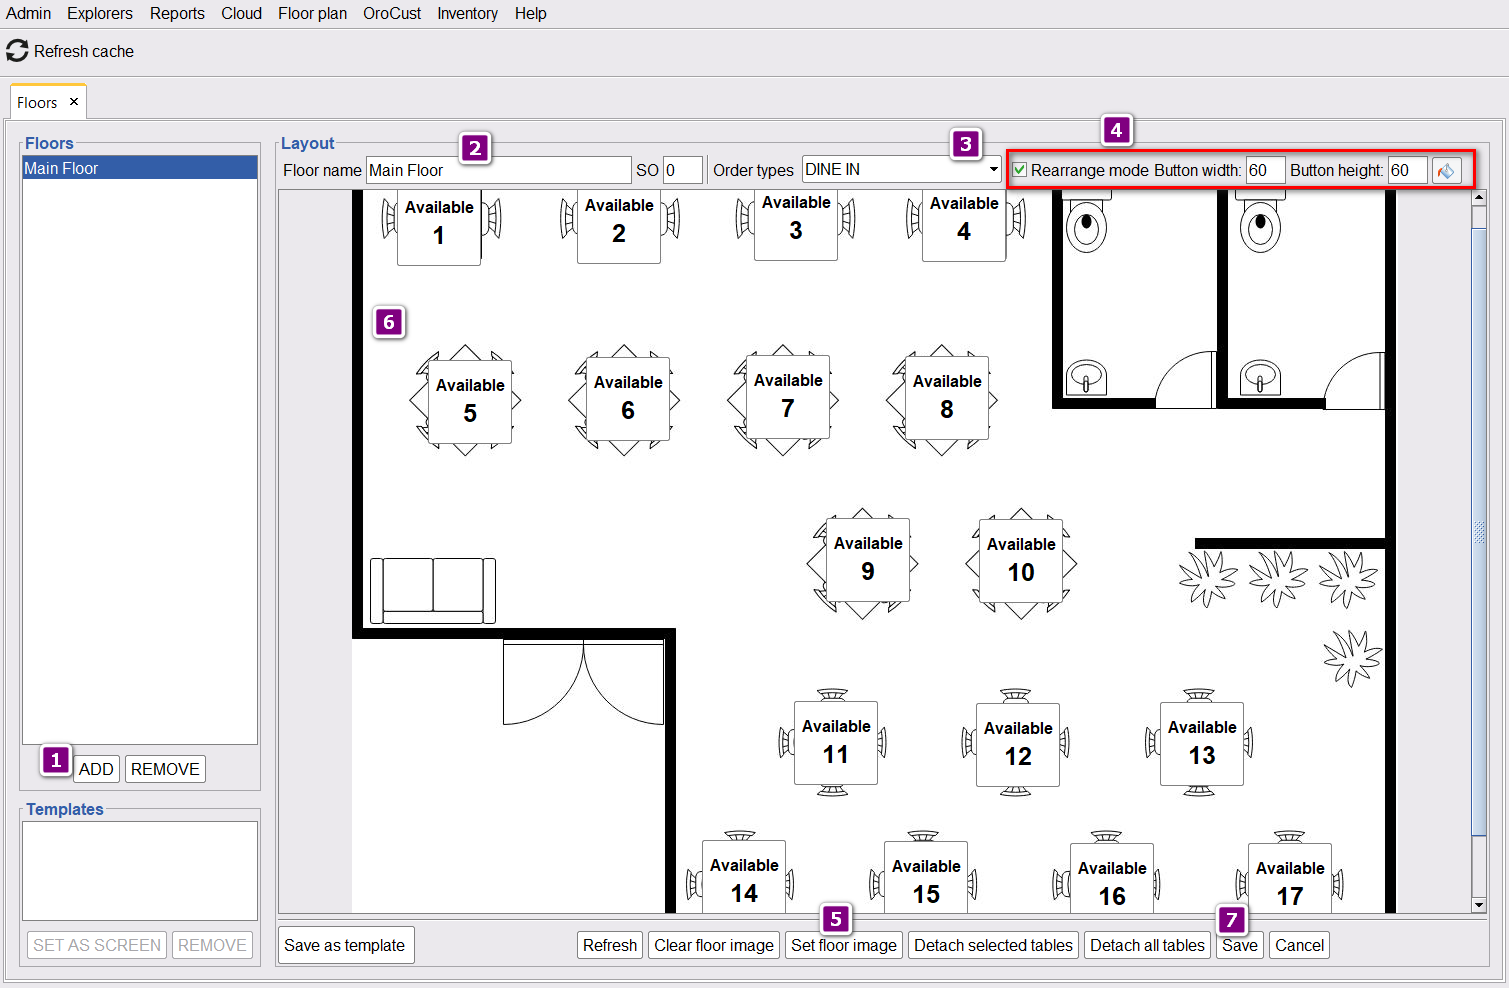
- Click on Add to initiate the process.
- Enter a floor name.
- Select the order type for which you are making this floor.
- Click on floor rearrange mode to rearrange the tables and other settings.
- If you have a floorplan image to add, you can add it by clicking the set floor image.
- A large may increase load time.
We recommend using background-color instead of images (shown in the right most corner in 4 in the picture). - You can drag and drop any table everywhere on the floor. You can also create a new table by tapping twice or double-clicking.
Finally, save your floor.
Using Templates
Some fine dine-in restaurants need to change their Floor plans in events. In that case, they can save layouts as a template and apply as necessary.
Create a Template
- Turn on rearrange mode.
- Move a table as required.
- Save as a template.
- Set as a screen to make it default.
- Now save it.
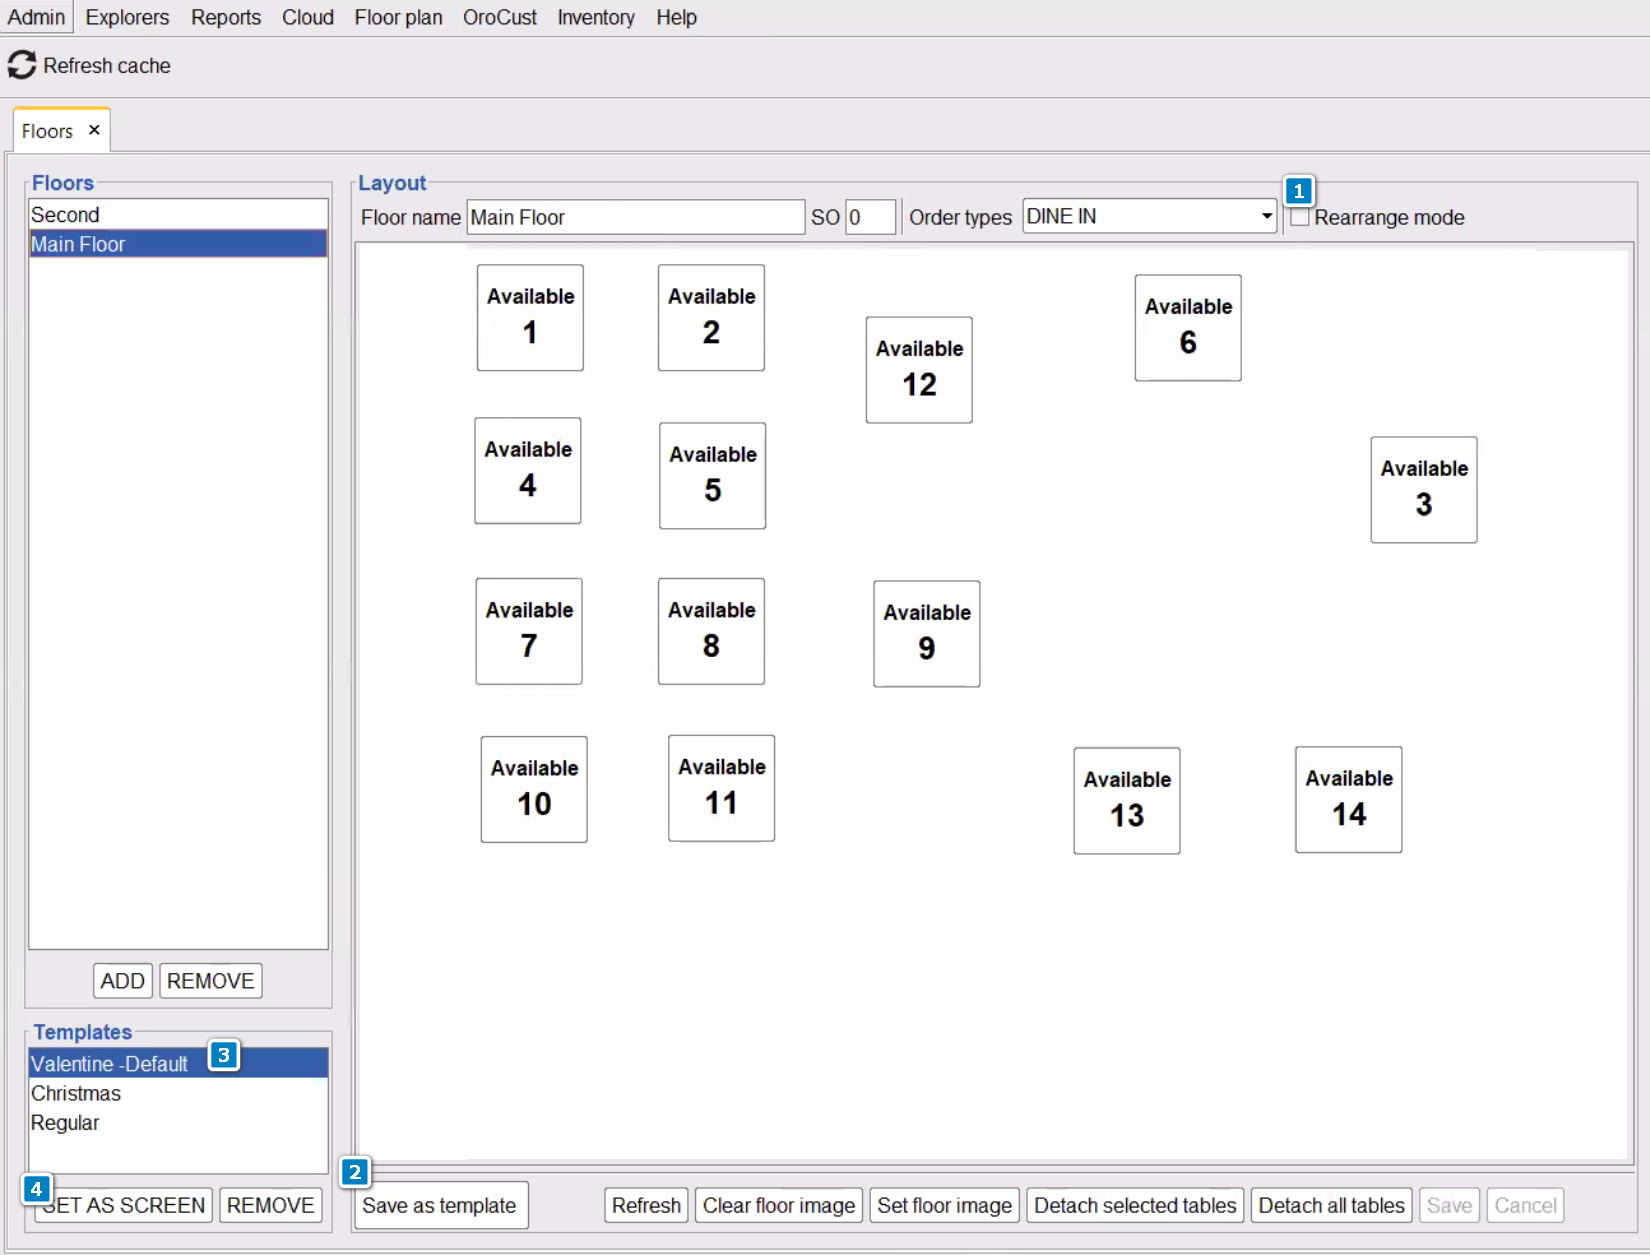
Switch to other templates
Now in the same way you can make other templates and switch to those templates. Make sure you make only one template as default.